Creating a Help Center portal
Updated at 2025-03-19
With Hikari CS, you have the opportunity to craft your own distinctive help center, allowing your customers to access valuable self-service information before reaching out to your customer service team.
In the guide that follows, we'll walk you through the quick steps to setting up a Help Center for your business using the Hikari CS platform.
1. Create your first help center portal
If this is your initial help center portal, you will notice a button like the one shown below. If it isn't your first, the button might appear differently, but the process remains similar. Please note that there is no current limit on the number of Help Centers you can create.

2. Configuring the basic settings
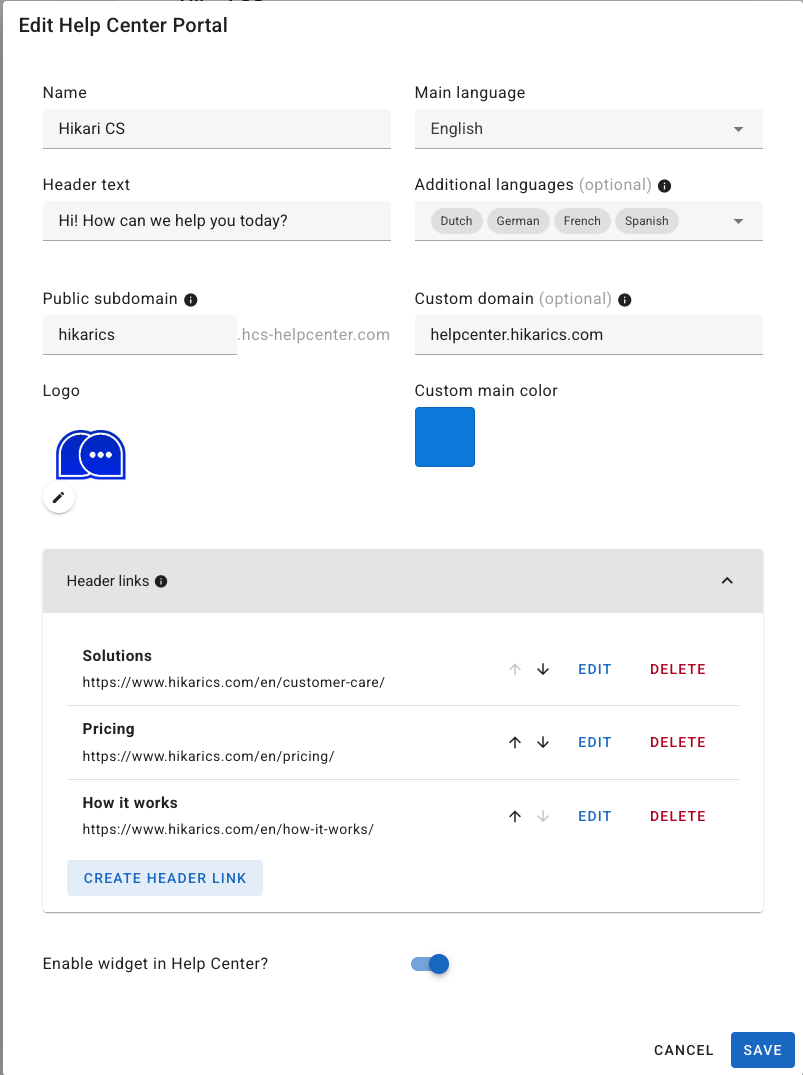
After you’ve created your Help Center, the following form will be displayed. The settings are mostly self-explanatory, but we'll provide some highlights on them individually.
- Name: The title and name as shown in your Help Center.
- Main Language: This is the primary or backup language your portal uses. We recommend writing your articles in this language.
- Additional languages: Your Help Center will be (automatically) translated to these languages using your account’s AI settings.
- Header text: The main greeting displayed on your Help Center’s main page.
- Public subdomain: If you aren’t using a custom domain, your Help Center’s default domain will end with “hcs-helpcenter.com”. You can specify the suffix here.
- Custom domain: You can utilize a custom domain for your Help Center. A quick guide for configuring a custom domain is available here.
- Header Links: These function as menu links guiding to your main website or any other page.
- Enable widget: Lastly, you can opt to enable your support chat widget within the Help Center.
Simple, right? Next, let's move on to creating Help Center articles.