How to setup live chat
Updated at 2026-07-26
The live chat widget lets visitors on your website start real-time conversations with your team. You can customize the appearance, welcome message, and behavior to match your brand.
Open the Inboxes page
Go to your project settings and open the Inboxes page.
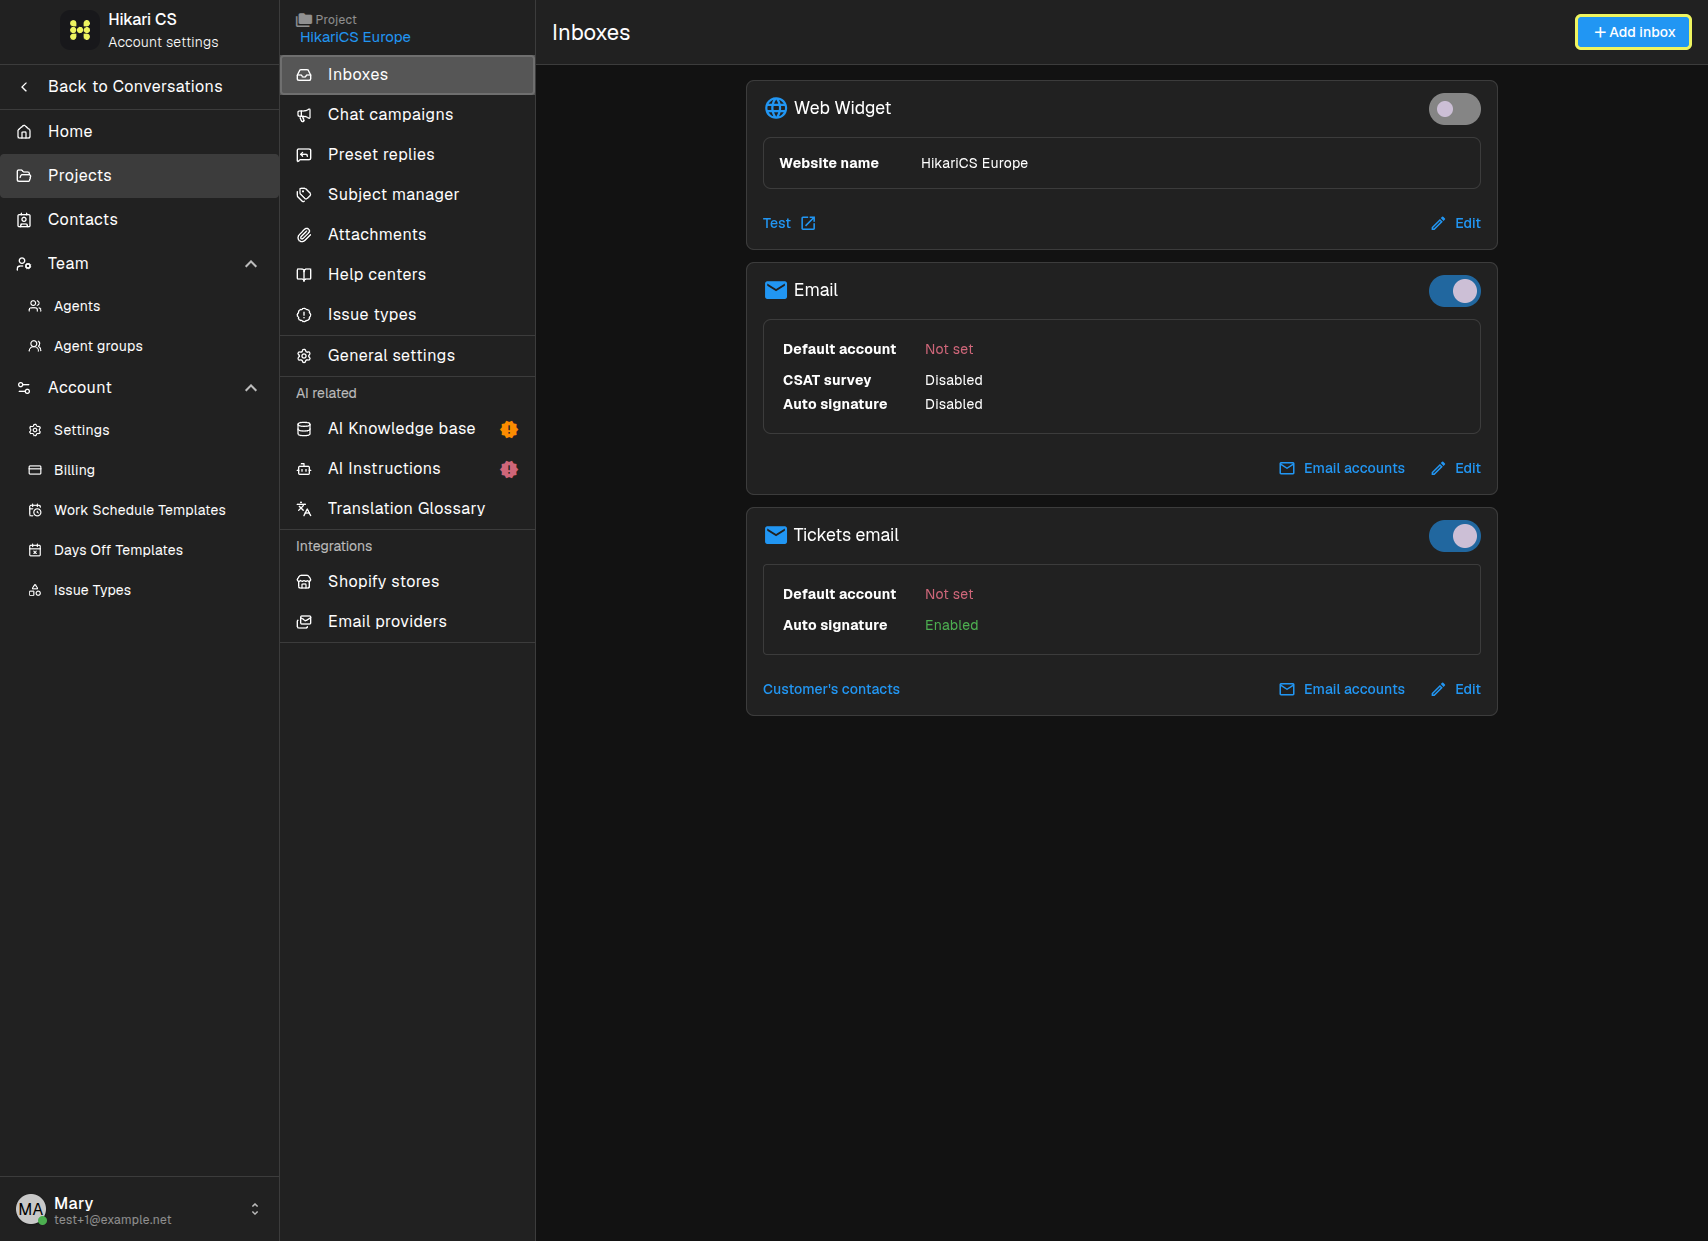
Add a website widget inbox
Click Add inbox and select Website widget. The widget is created automatically and appears in the list.
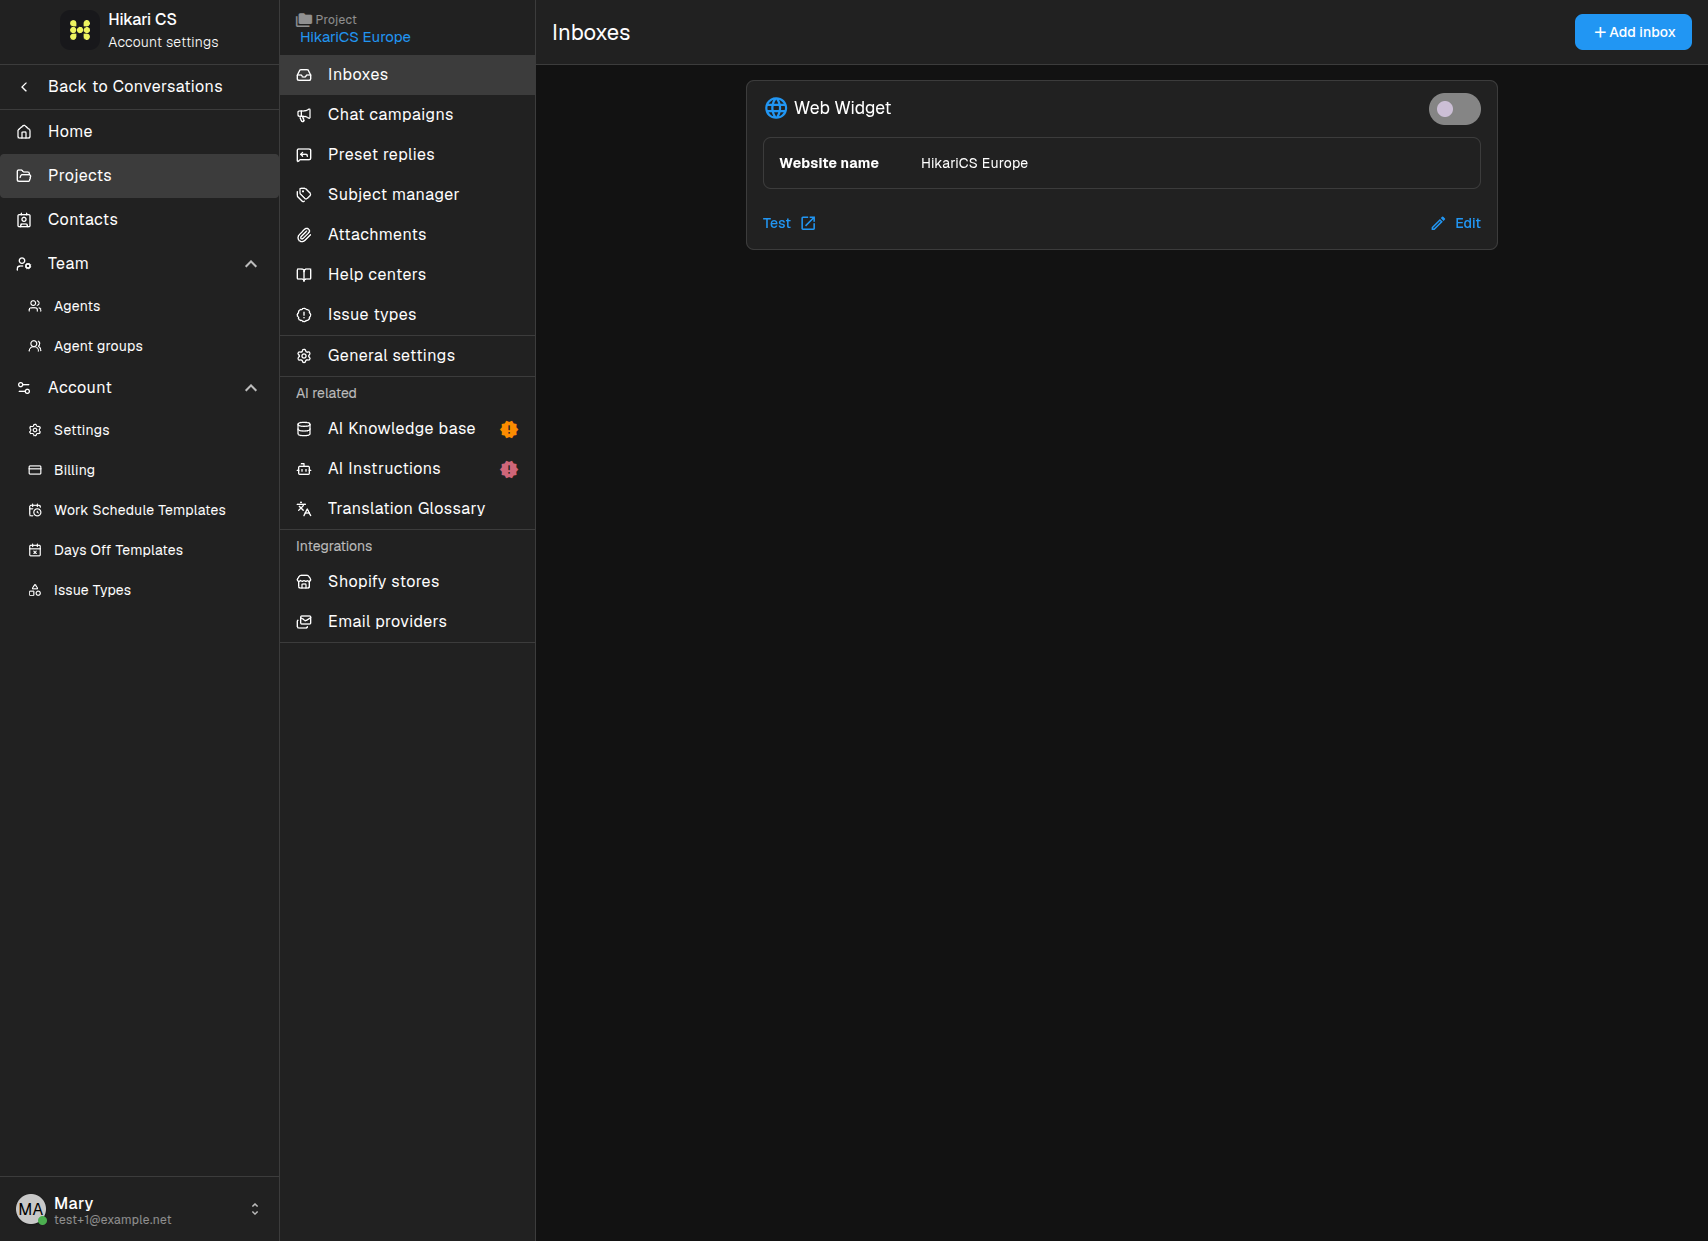
Customize the widget
Click Edit to open the widget settings. Here you can change the name, colors, welcome text, reply-time display, and AI assistant options.
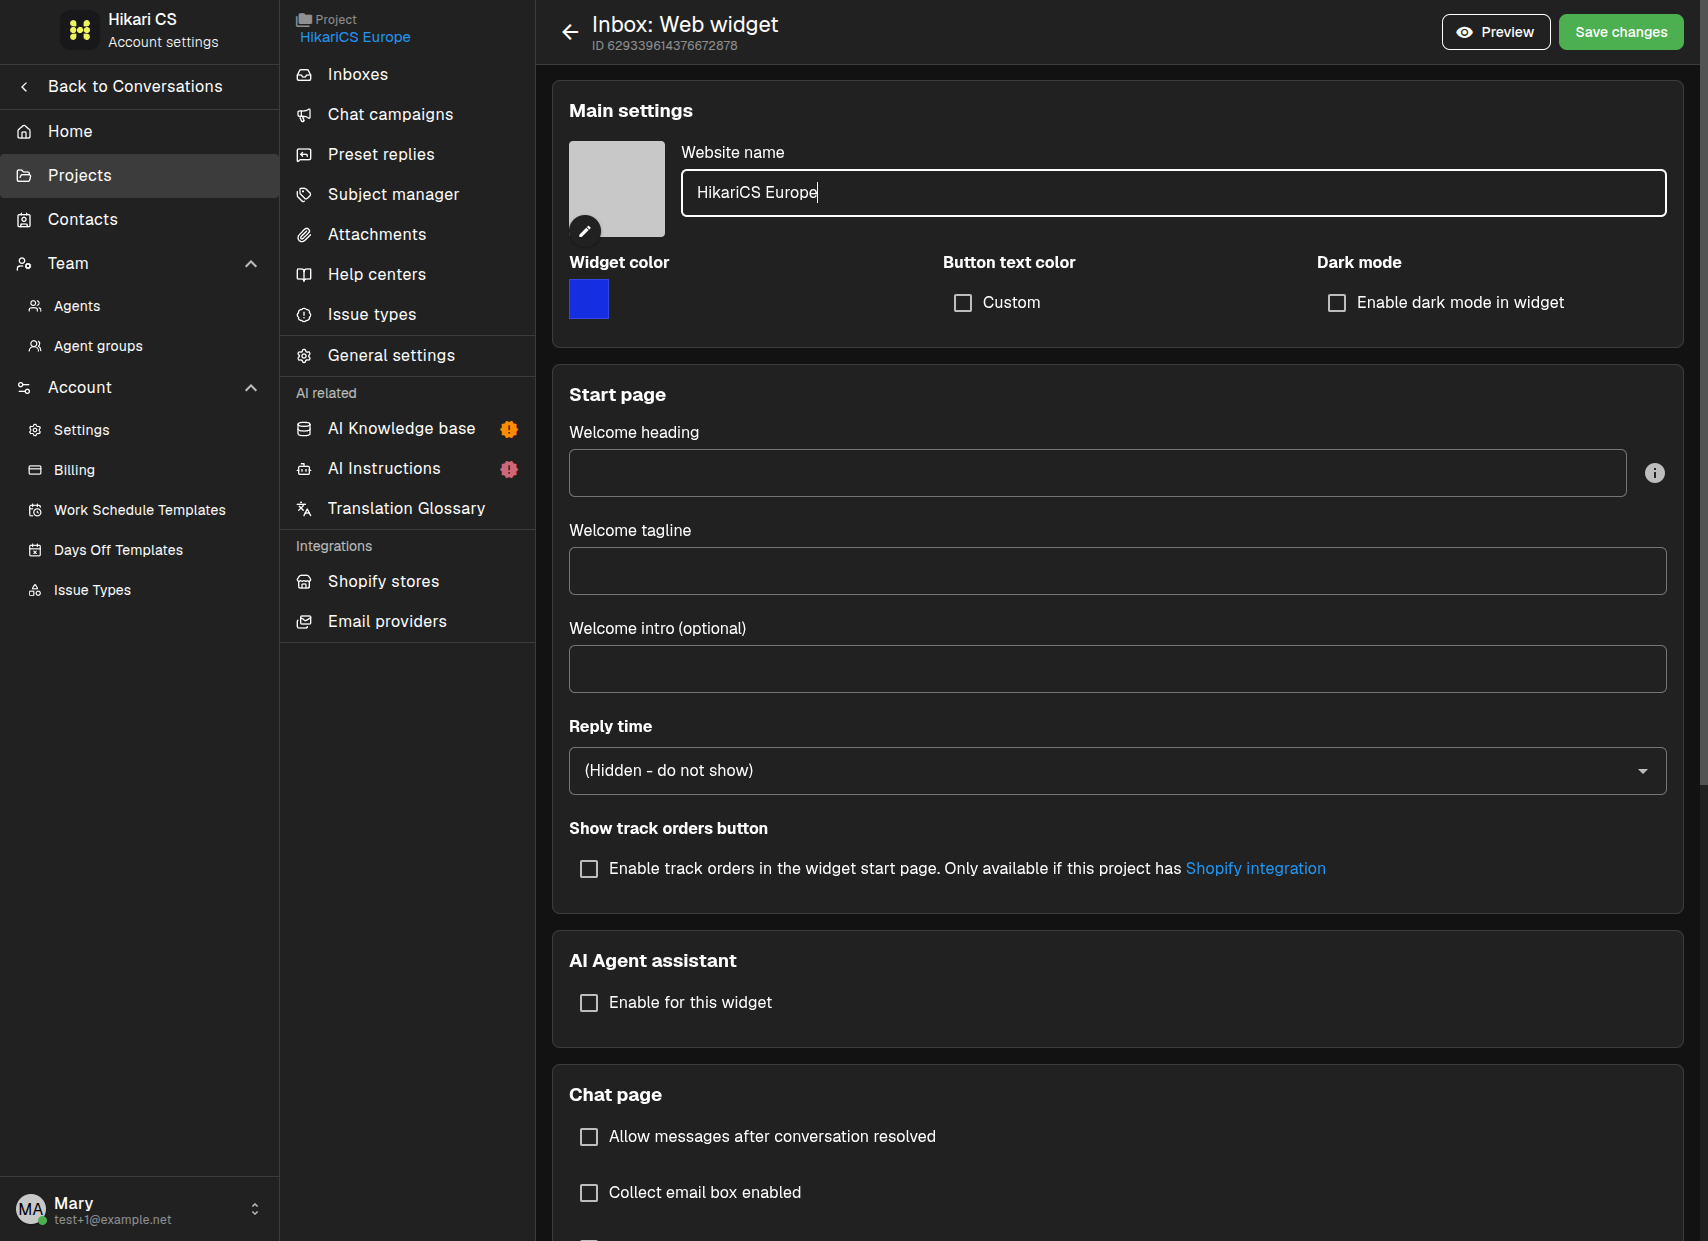
Start page
Set the heading, tagline, and optional intro text that visitors see when they open the widget.
Appearance
Choose the widget color, button text color, and enable dark mode if needed. Under Advanced options you can adjust the button position, style, offsets, and z-index for both desktop and mobile.
AI Agent assistant
Enable the AI Agent for this widget if you want the bot to handle conversations automatically.
Working hours
Enable business availability to show your open hours on the widget, even when all agents are offline.
Preview the widget
Click Preview to see how the widget looks on a sample page. Use the Open widget button to open the chat window and test the start page.
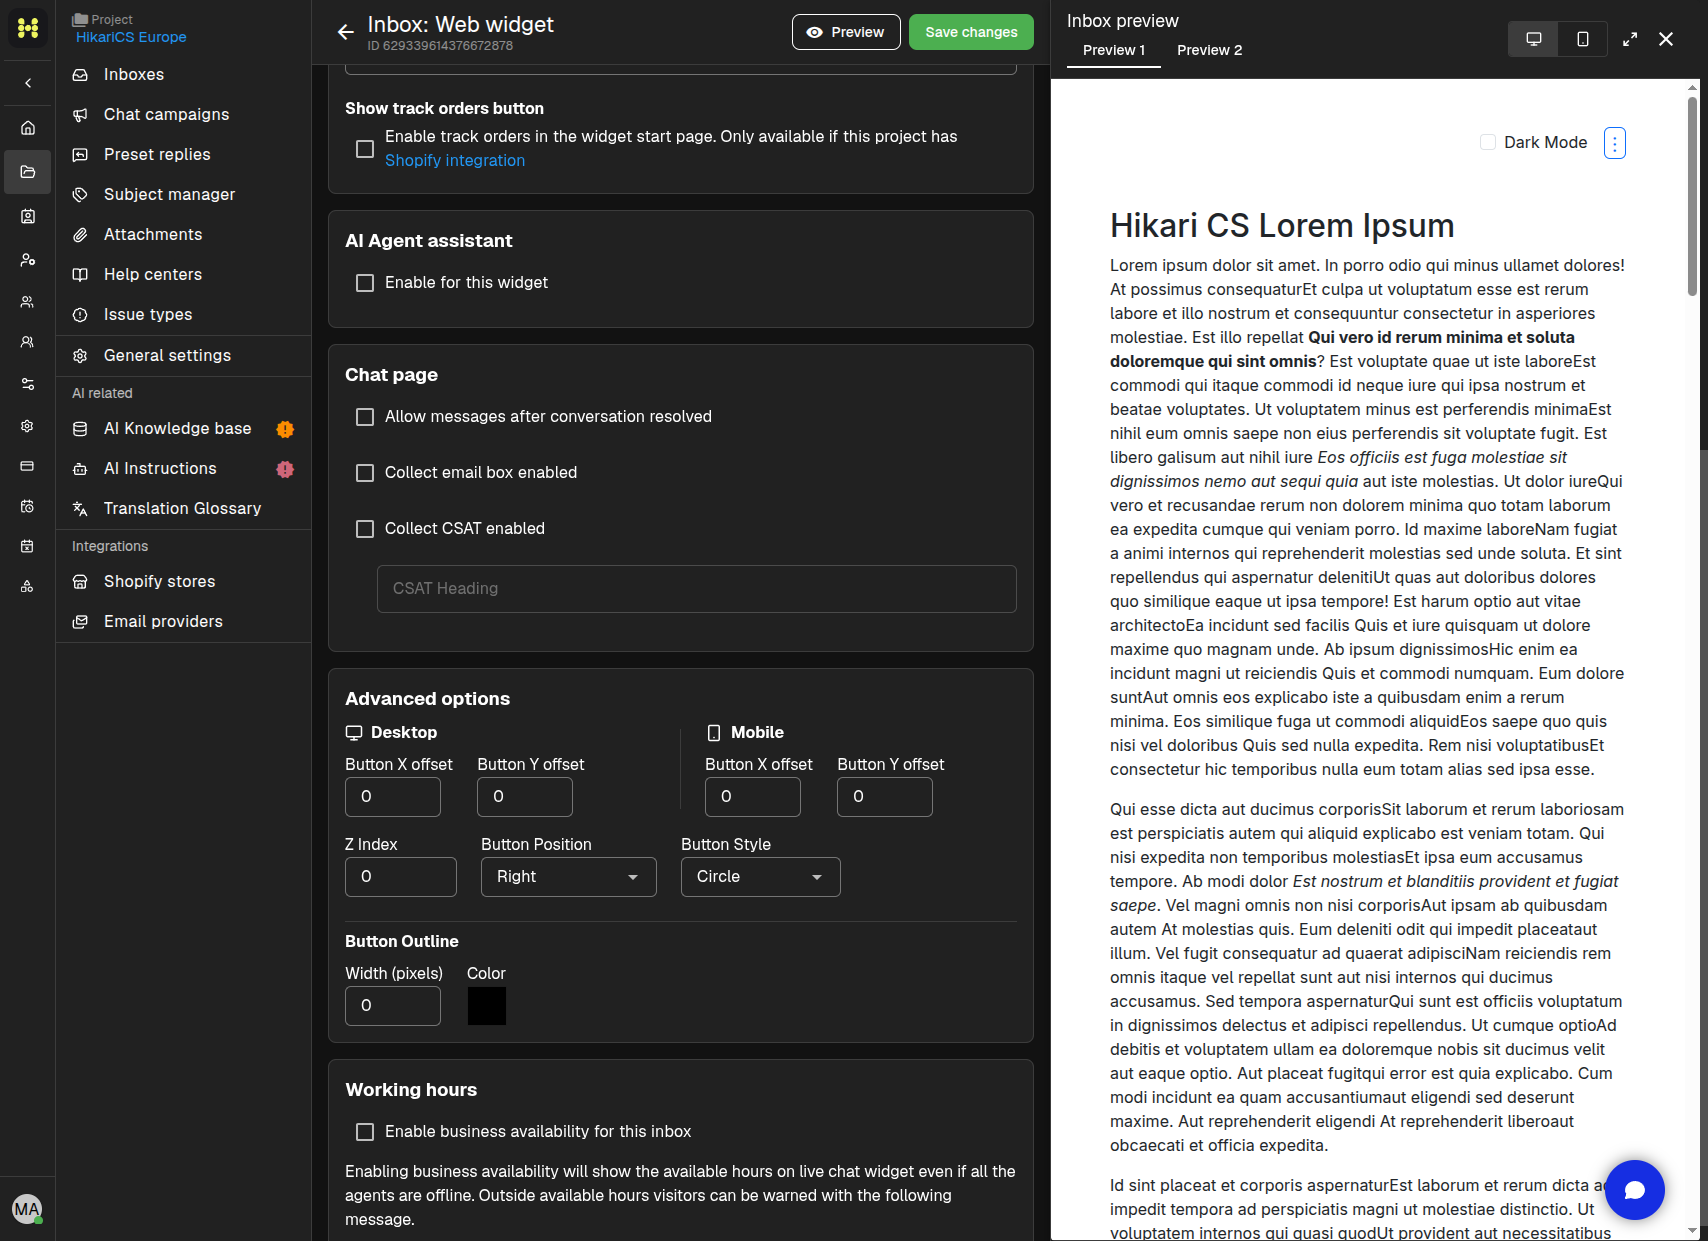
Save your changes
After customizing the widget, click Save changes. The widget is now ready to be added to your website.
Summary
- Open Inboxes in your project settings.
- Click Add inbox > Website widget.
- Click Edit to customize the widget appearance and messages.
- Use Preview to test the widget before saving.