How to setup email accounts
Updated at 2026-07-26
Email inboxes let customers reach your team by sending messages to a connected email address. You can connect Microsoft 365, Gmail, or any other provider that supports IMAP/SMTP.
Open the Inboxes page
Go to your project settings and open the Inboxes page.
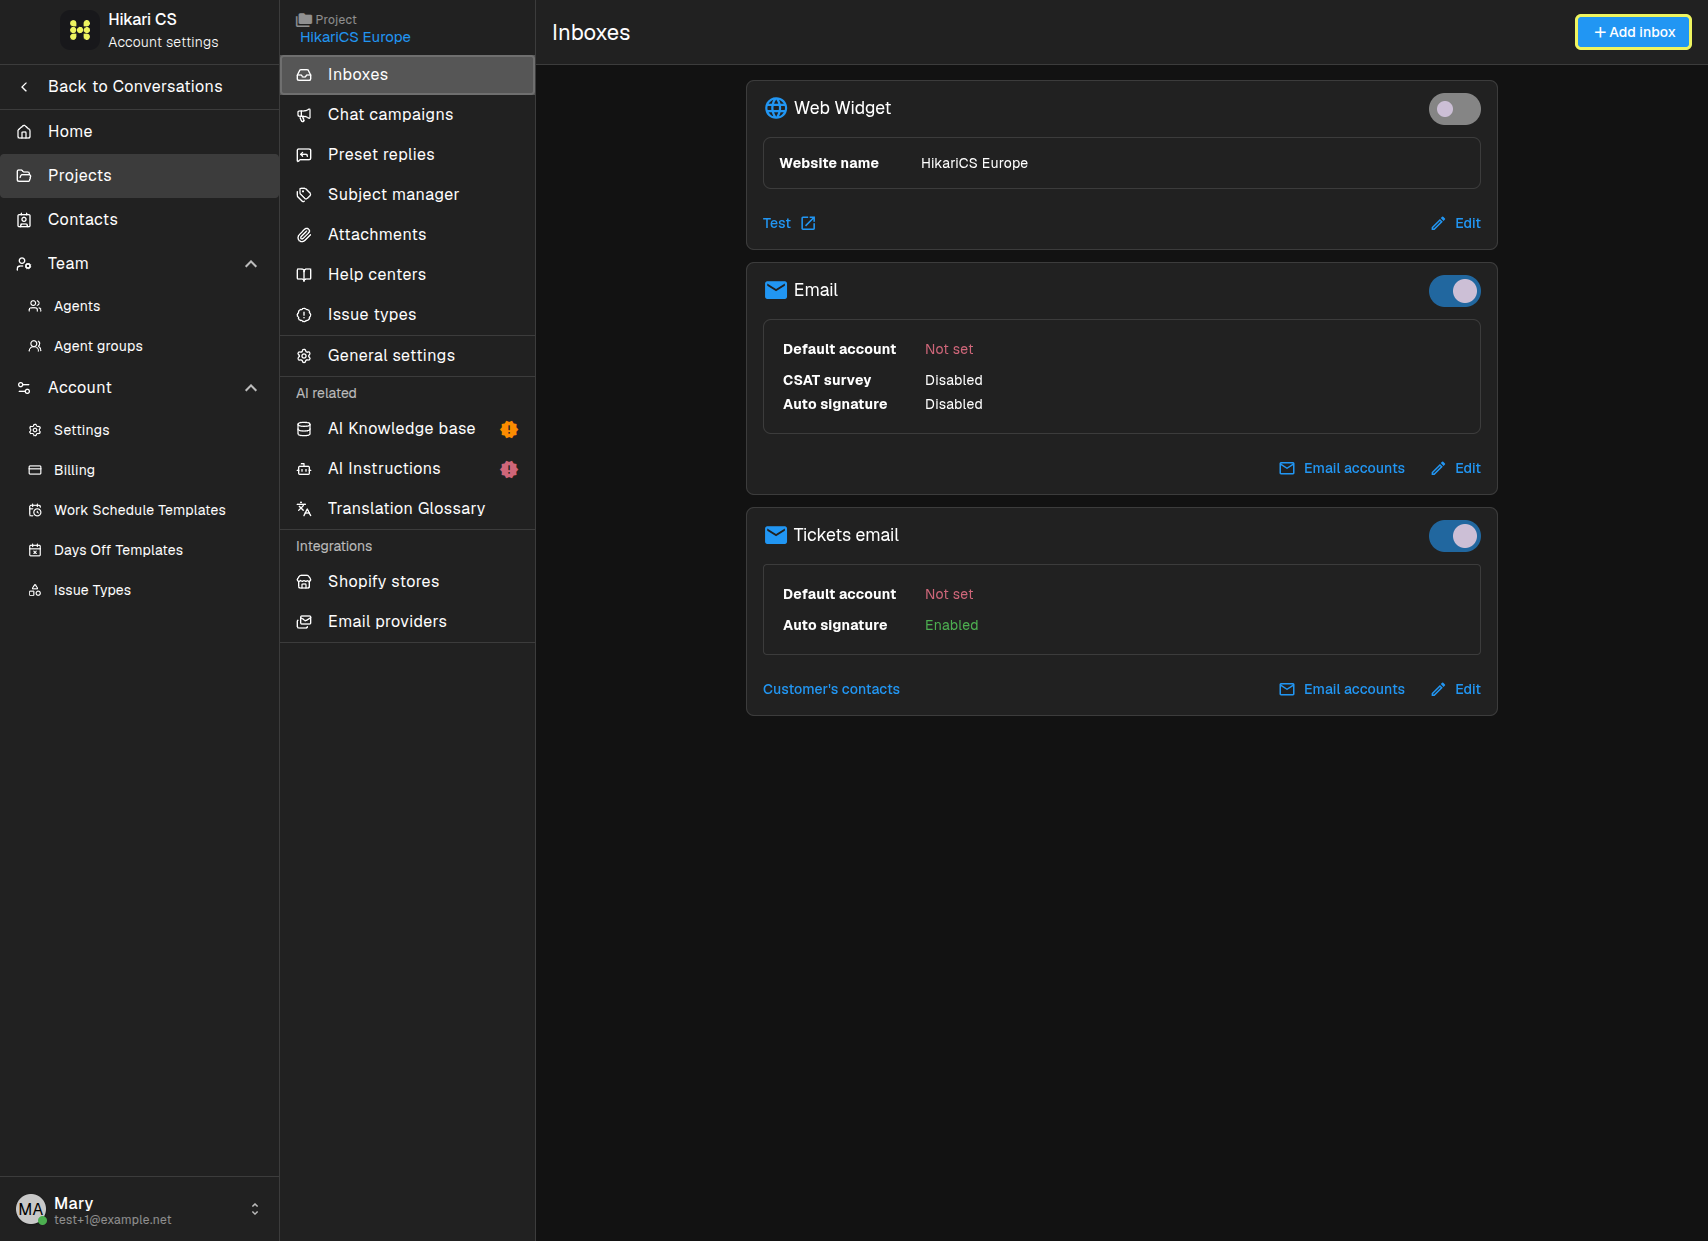
Add an email inbox
Click Add inbox and select Email. In a fresh new project, you can also set up inboxes for your Website Widget, Facebook Messenger, and Instagram. If the menu shows disabled options, then you can configure the already created inboxes instead.
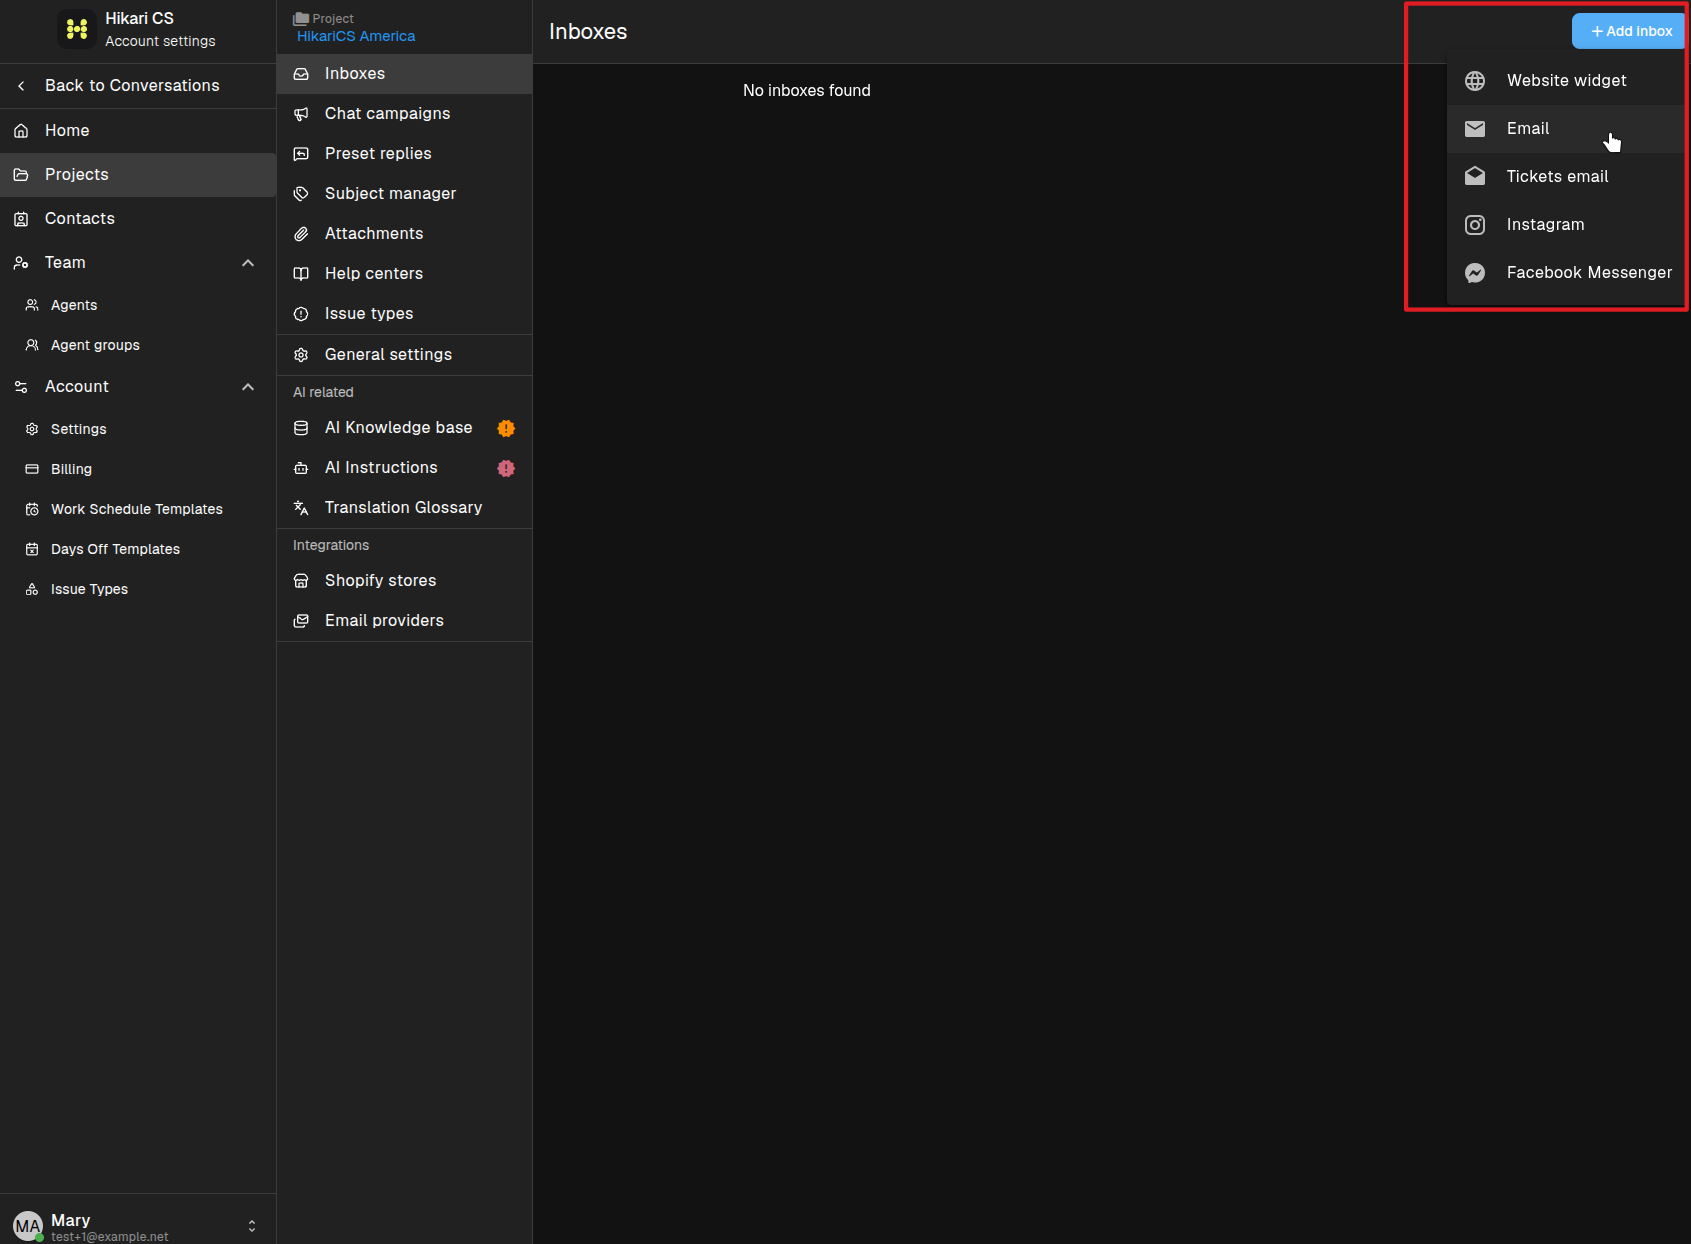
Choose an email provider
Pick how you want to connect:
- Microsoft 365 account — for Outlook and Microsoft-hosted email.
- Gmail (via IMAP/SMTP) — for Google Workspace or Gmail addresses.
- Other (via IMAP/SMTP) — for any other email provider.
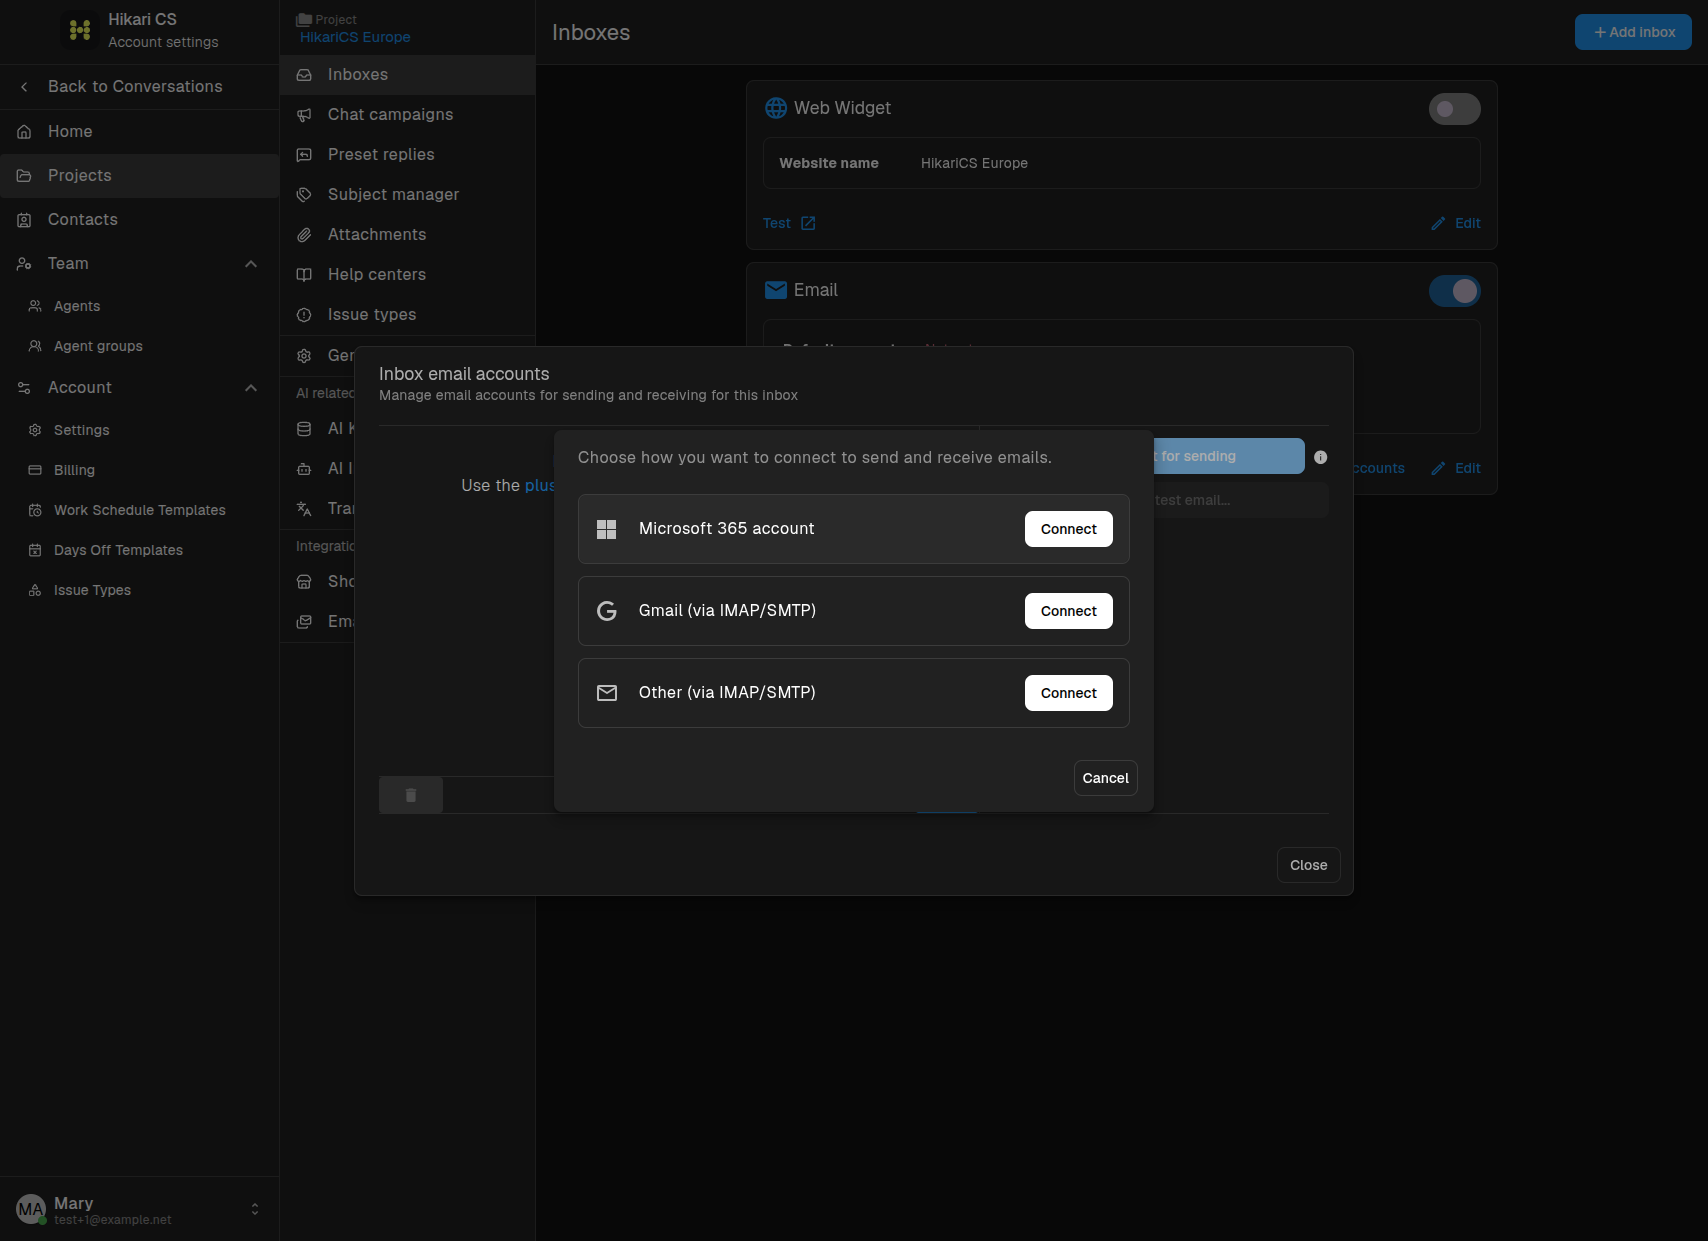
Click Connect and follow the sign-in steps for your provider.
Manage email accounts
After the inbox is created, click Email accounts to add or manage accounts for sending and receiving.
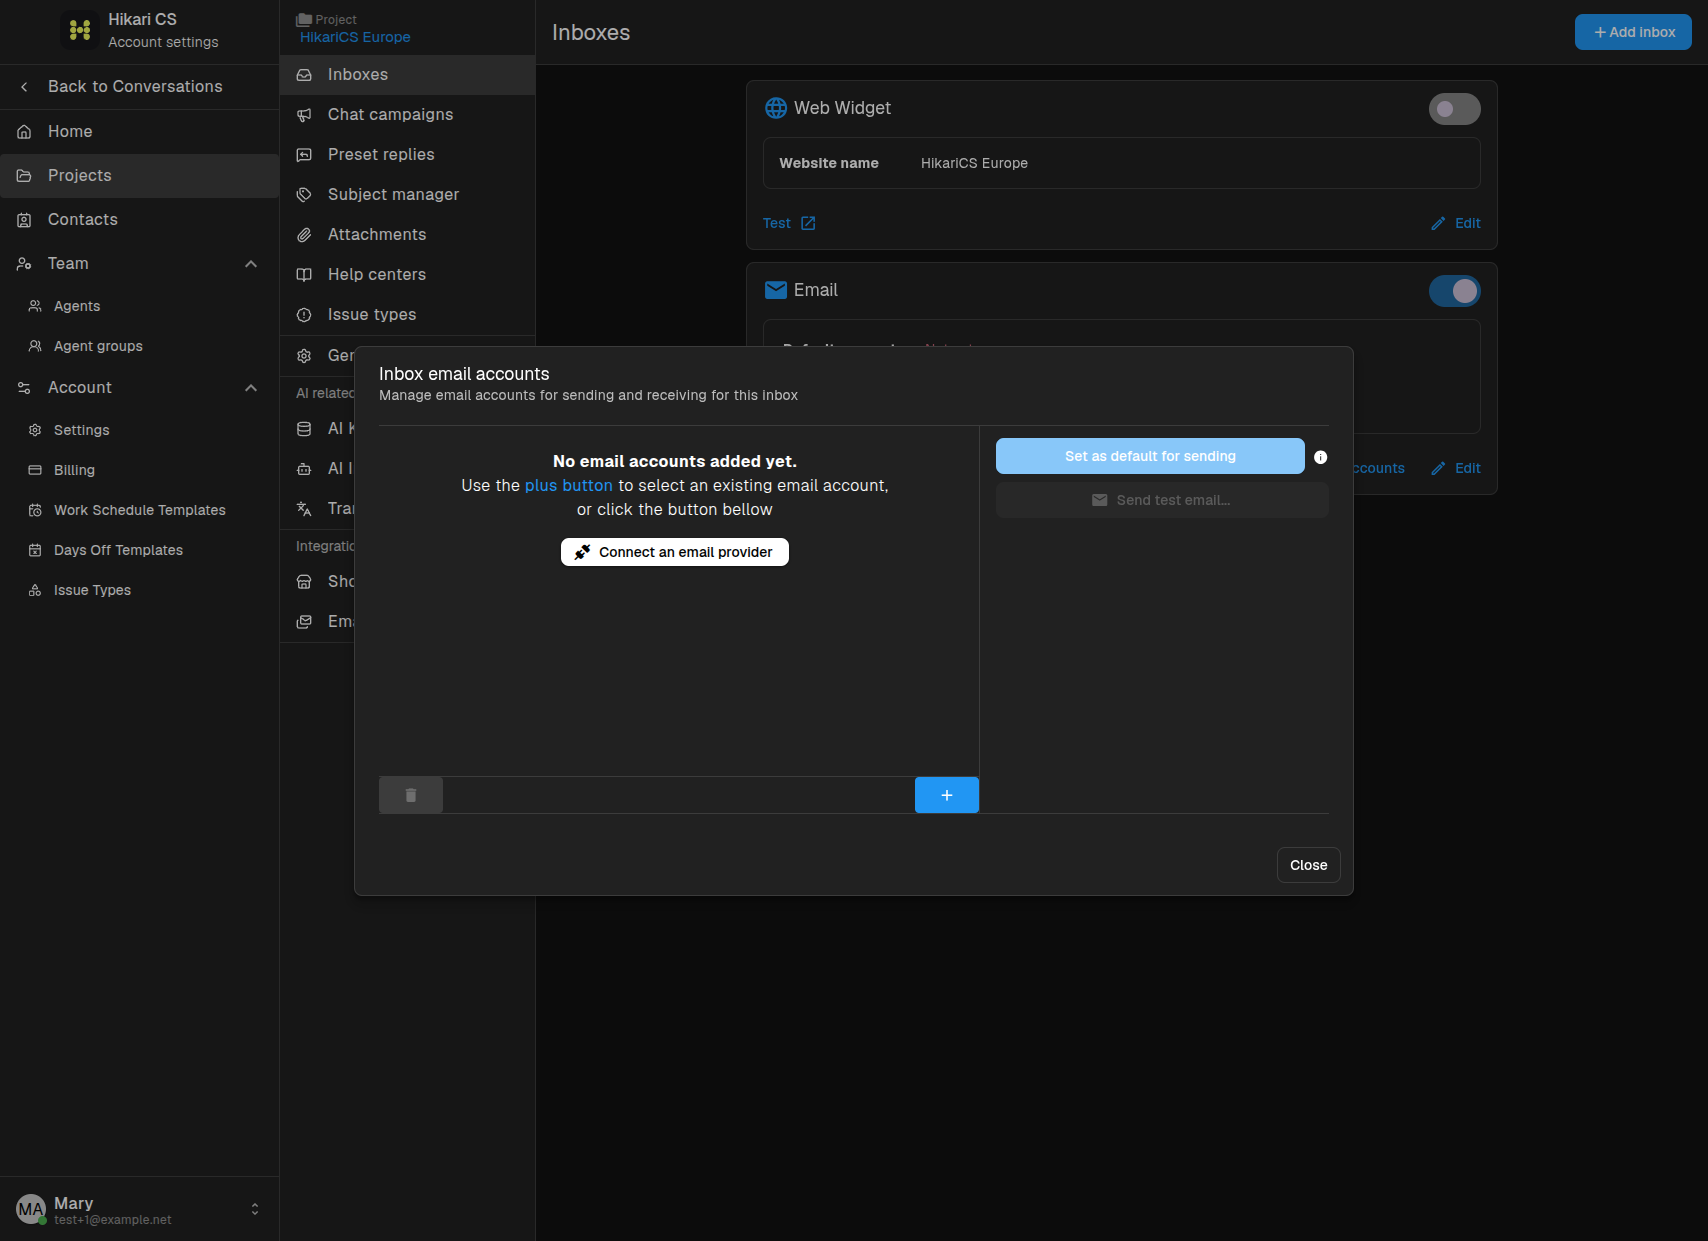
Click Connect an email provider to choose an existing connected account or add a new one.
View connected providers
You can also manage all connected accounts from Integrations > Email providers in the project sidebar.
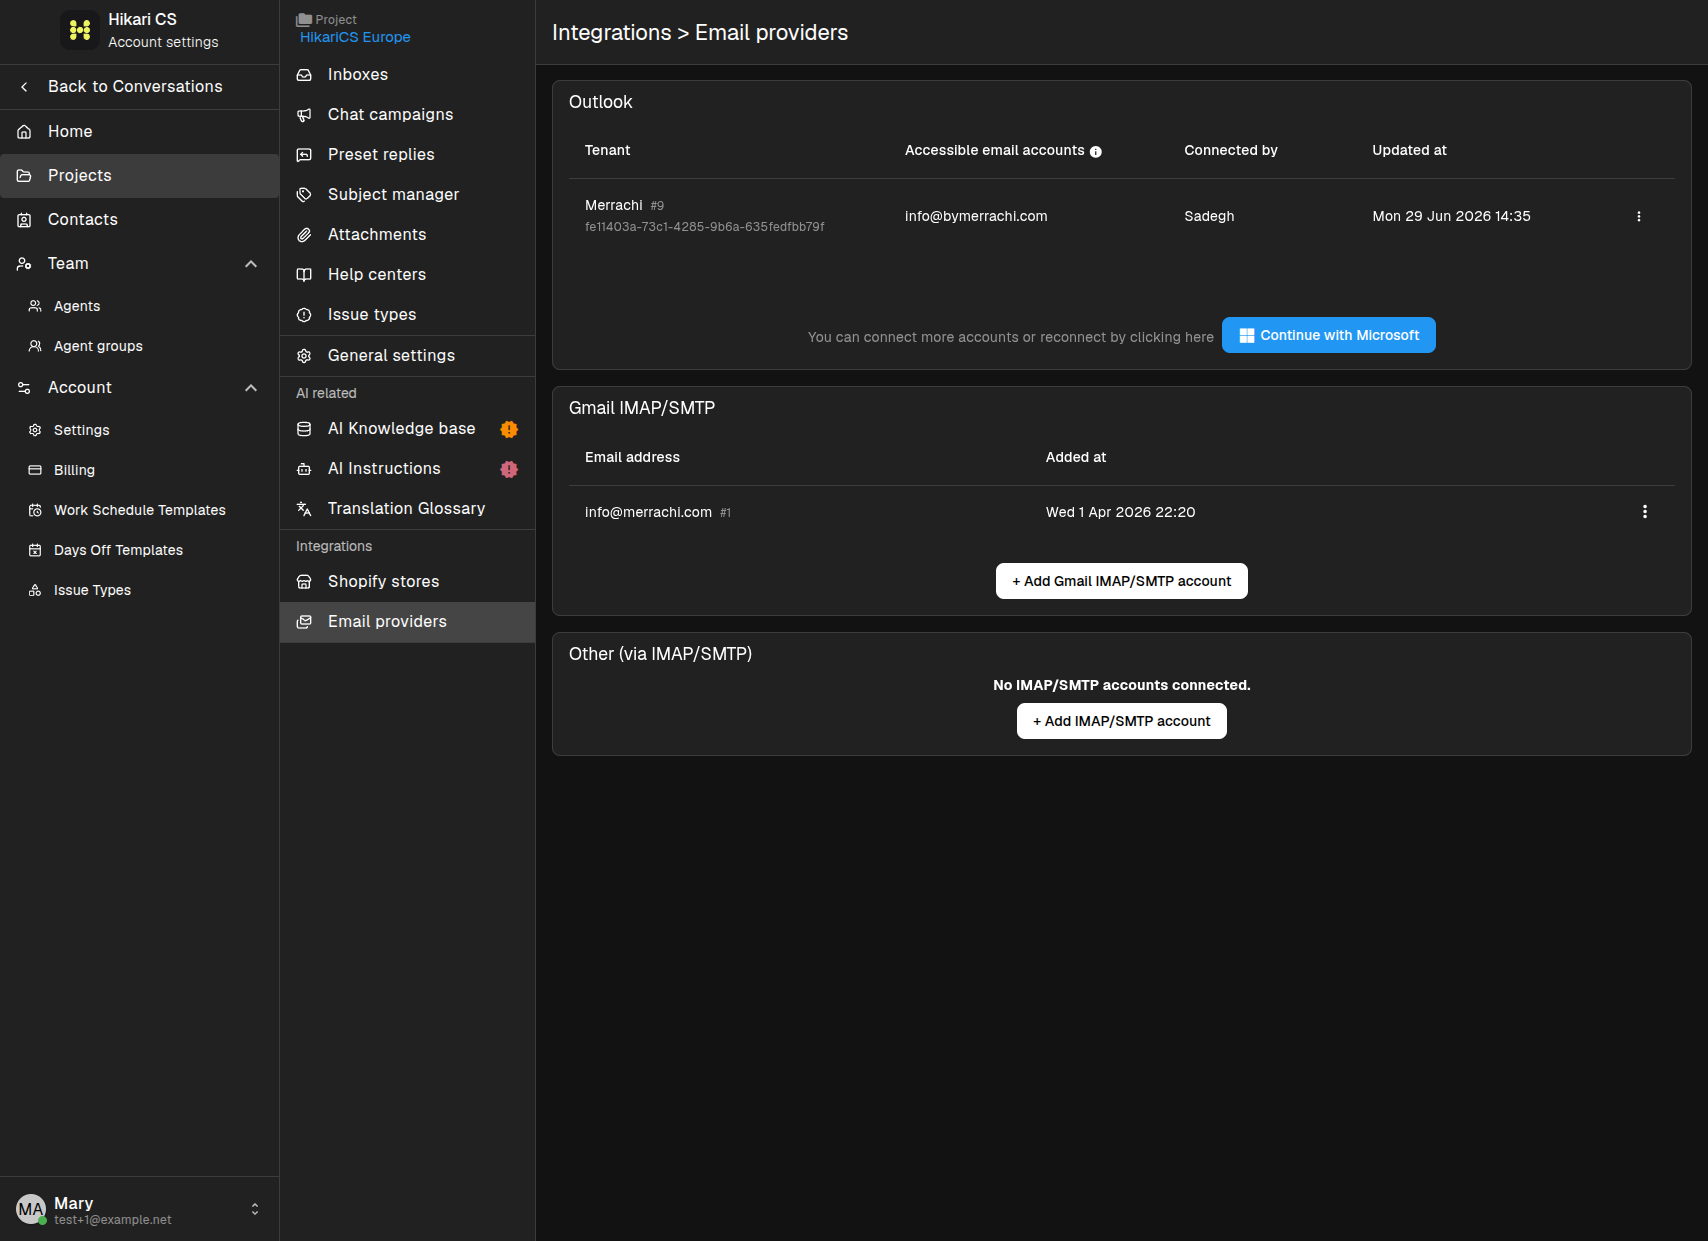
From here you can reconnect accounts, add new Gmail or IMAP/SMTP accounts, and review the latest update time.
Set the default sending account
When more than one email account is connected, select the one you want to use as the default sender and click Set as default for sending. You can also send a test email to confirm the connection.
Summary
- Open Inboxes in your project settings.
- Click Add inbox > Email.
- Choose Microsoft 365, Gmail, or Other and connect your account.
- Manage accounts from the inbox or from Email providers.
- Set a default sender and send a test email.