How to setup a live chat campaign
Updated at 2026-07-26
Chat campaigns let you automatically send a message to visitors after they spend some time on a specific page. Use them to offer help on product, FAQ, or checkout pages.
Open the Chat campaigns page
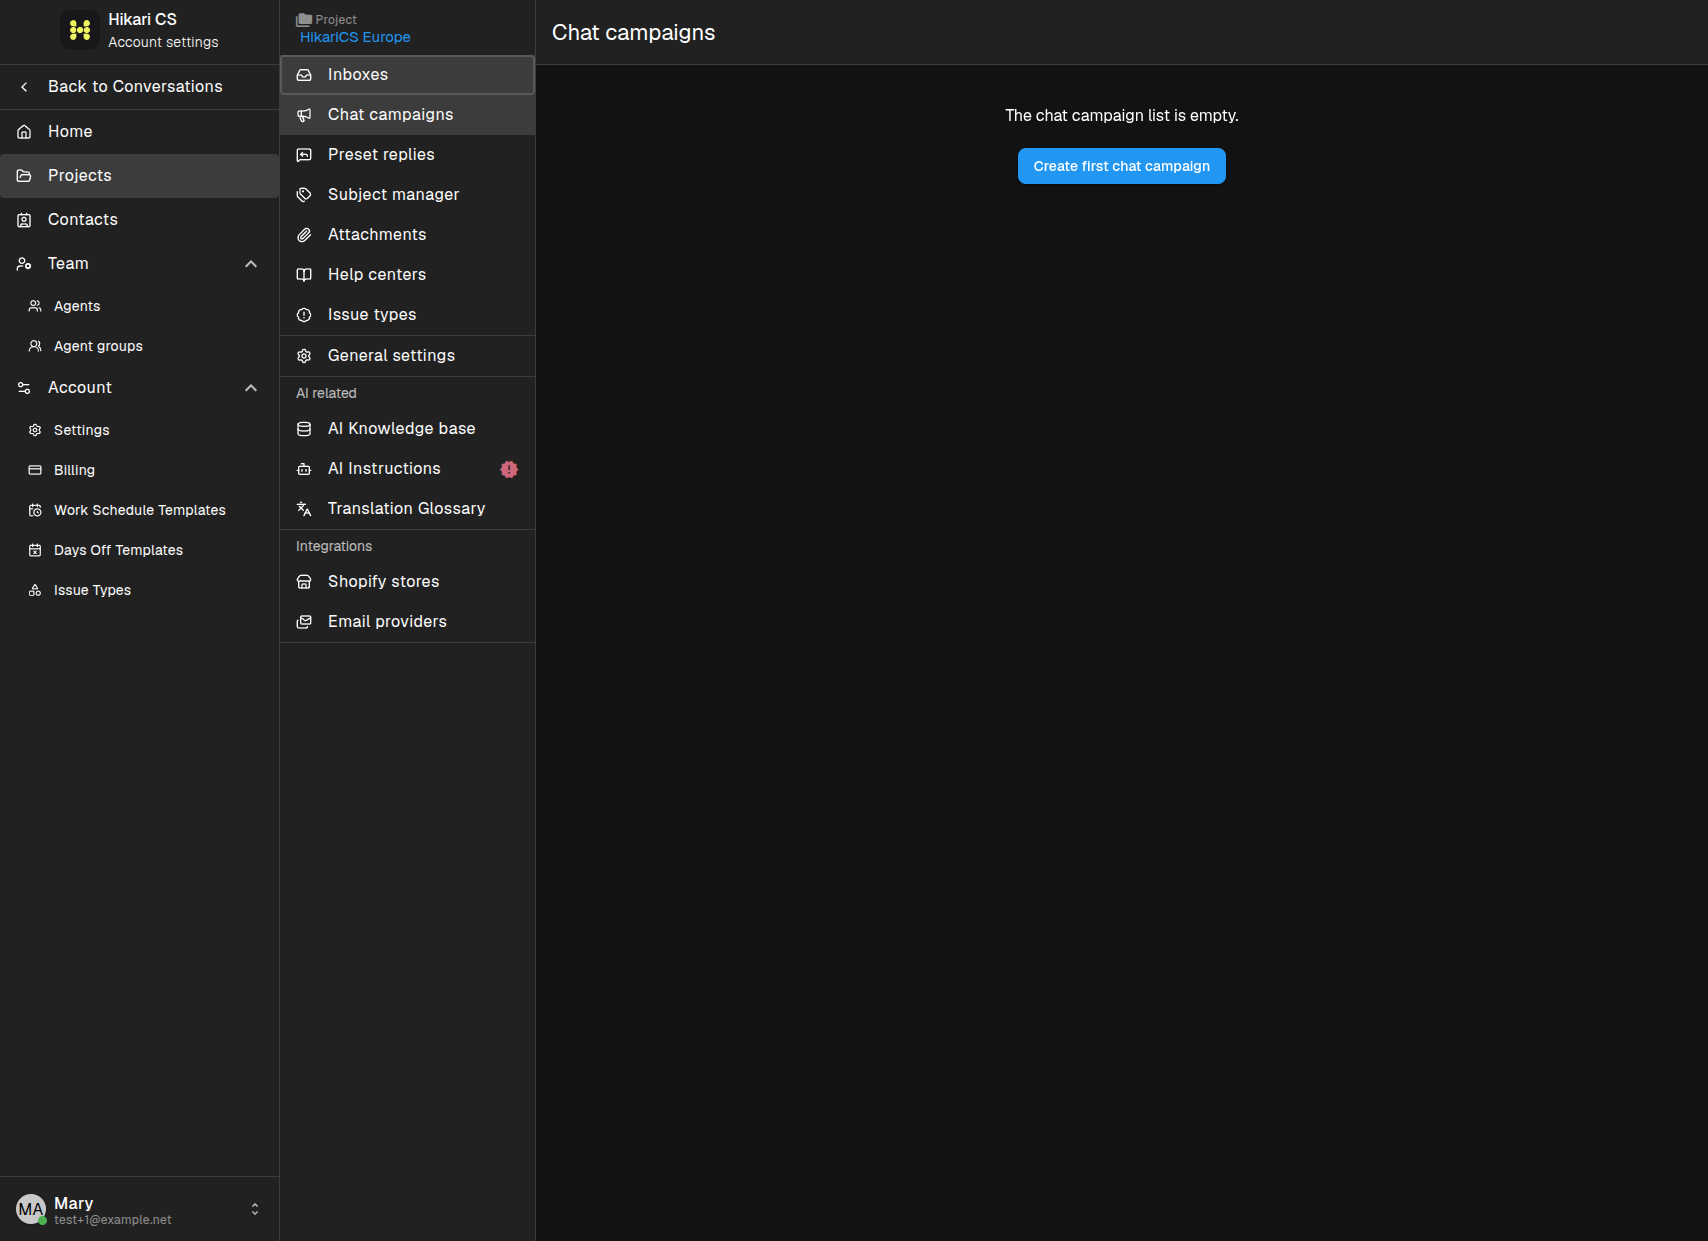
Go to your project settings and click Chat campaigns. If no campaigns exist yet, click Create first chat campaign.
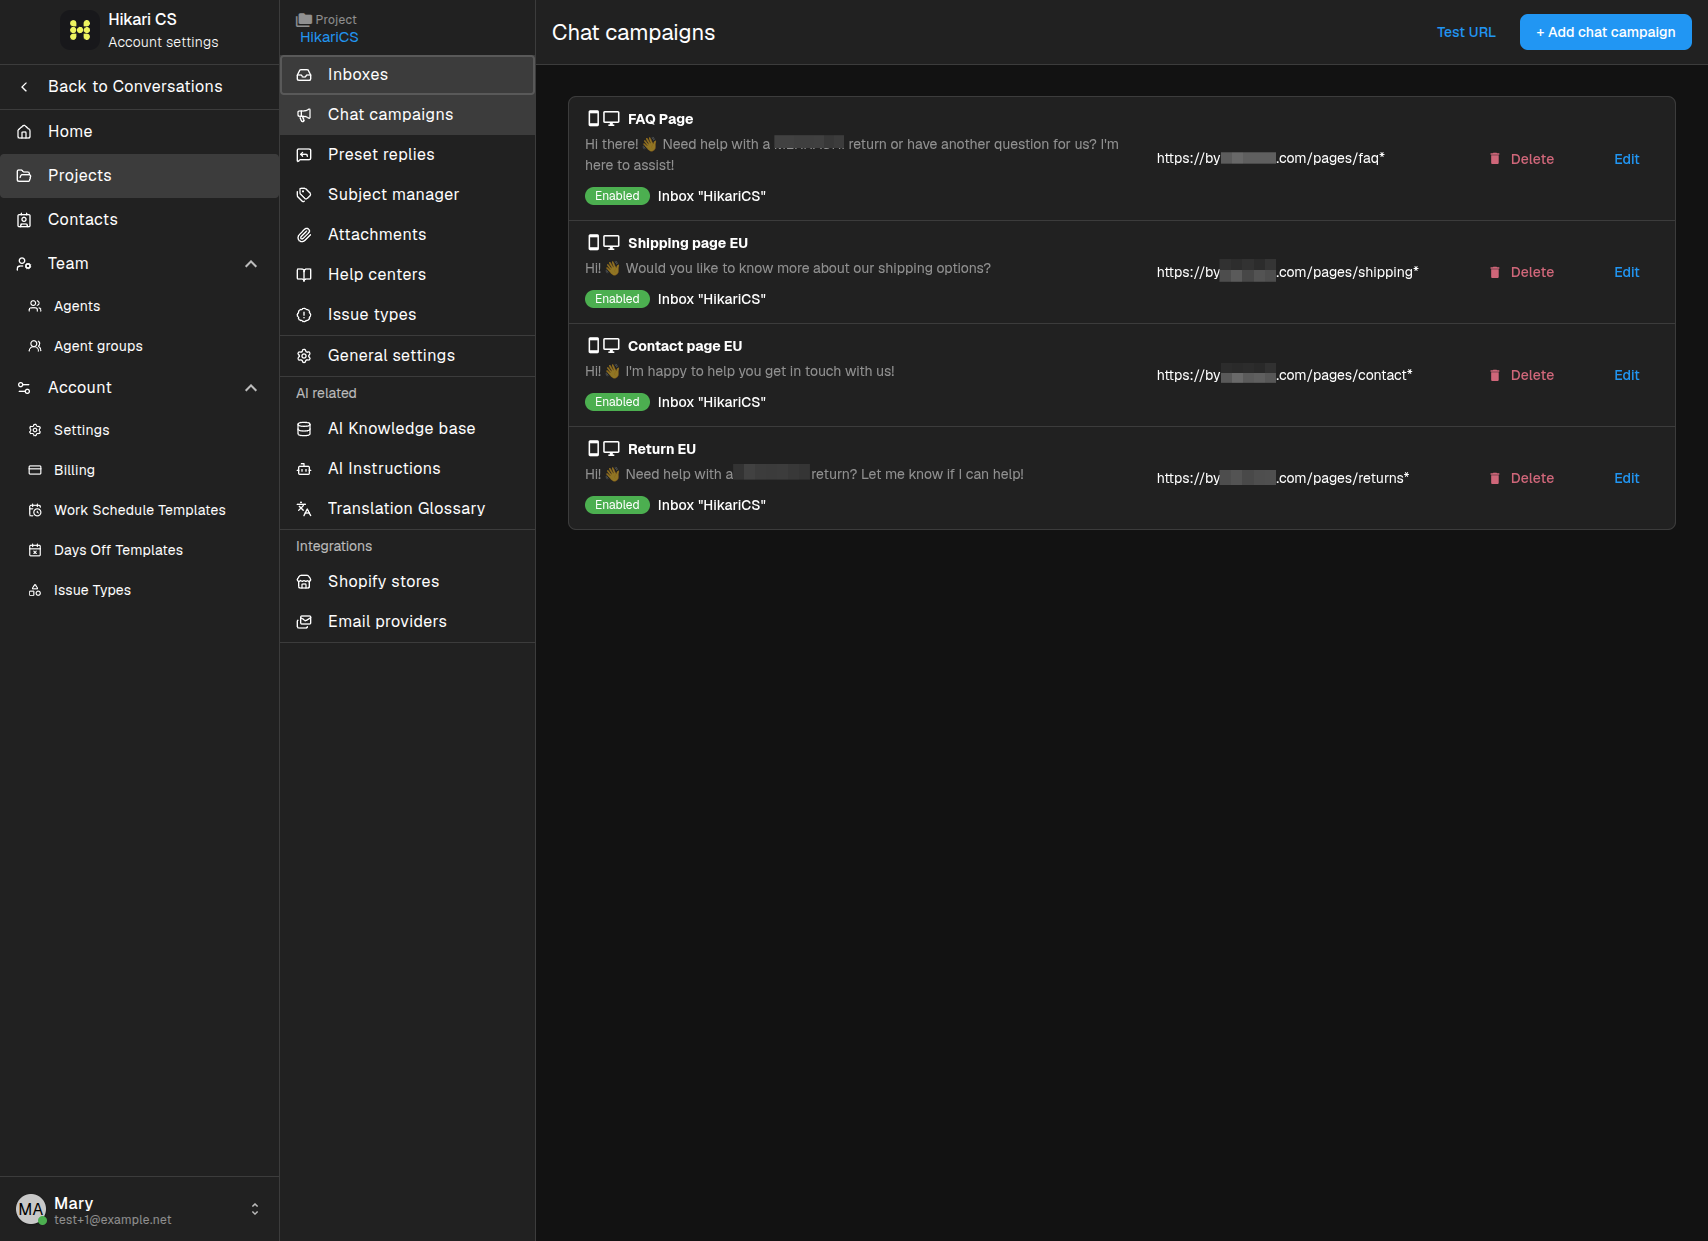
If you already have campaigns, click + Add chat campaign.
Fill in the campaign details
The new campaign form contains the following fields:
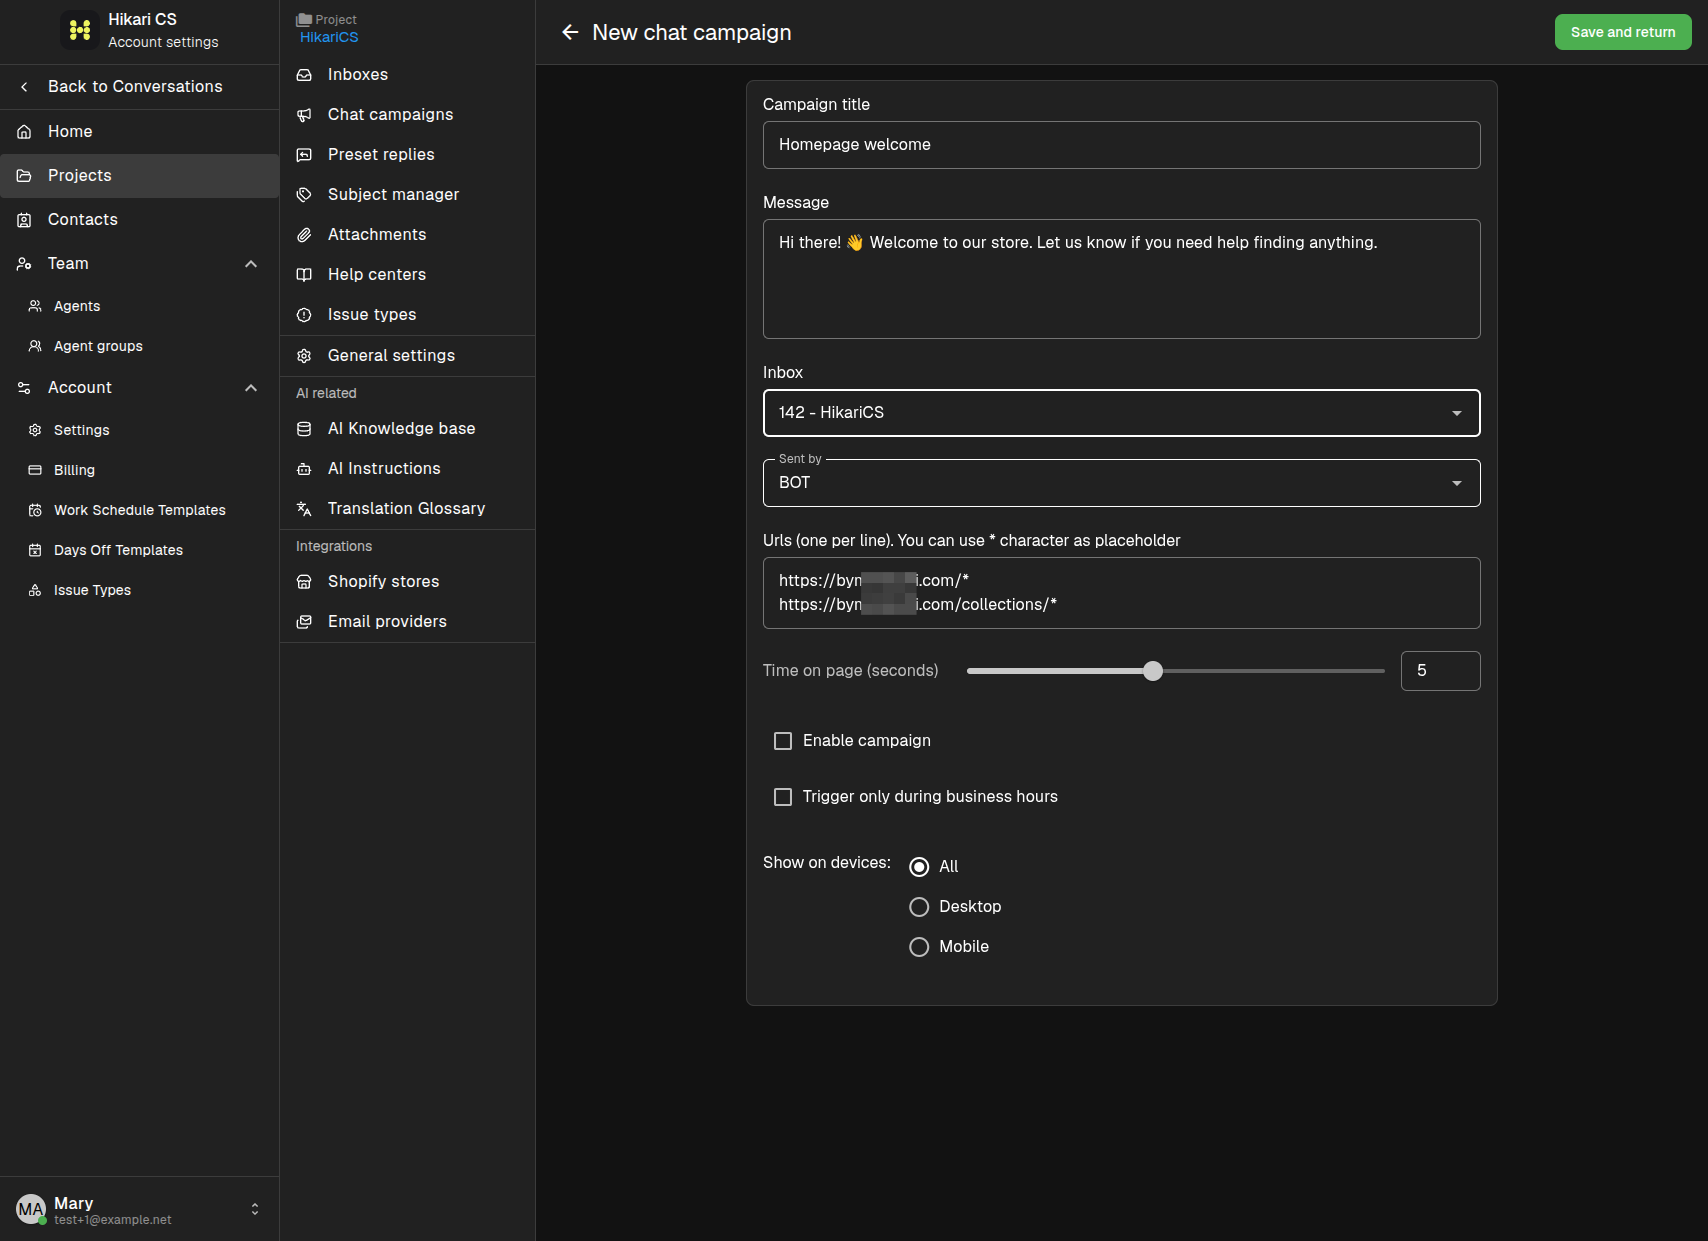
- Campaign title — an internal name so you can recognize the campaign in the list.
- Message — the text that will be sent to the visitor.
- Inbox — the website widget inbox the campaign belongs to.
- Sent by — choose BOT or a specific agent. This affects how the message appears in the conversation.
- Urls — the page addresses where the campaign should run. Enter one URL per line. Use
*as a wildcard, for examplehttps://example.com/products/*. - Time on page (seconds) — how long the visitor must stay on the page before the message is sent. You can choose a value between 1 and 10 seconds.
Choose when the campaign runs
After filling in the message and URL, set the campaign behavior:
- Enable campaign — turn the campaign on or off.
- Trigger only during business hours — limit the campaign to your configured working hours.
- Show on devices — show the campaign on all devices, only desktop, or only mobile.
When everything looks correct, click Save and return.
Test your URL rules
Use the Test URL button on the campaigns list to check whether a page URL matches any of your campaigns.
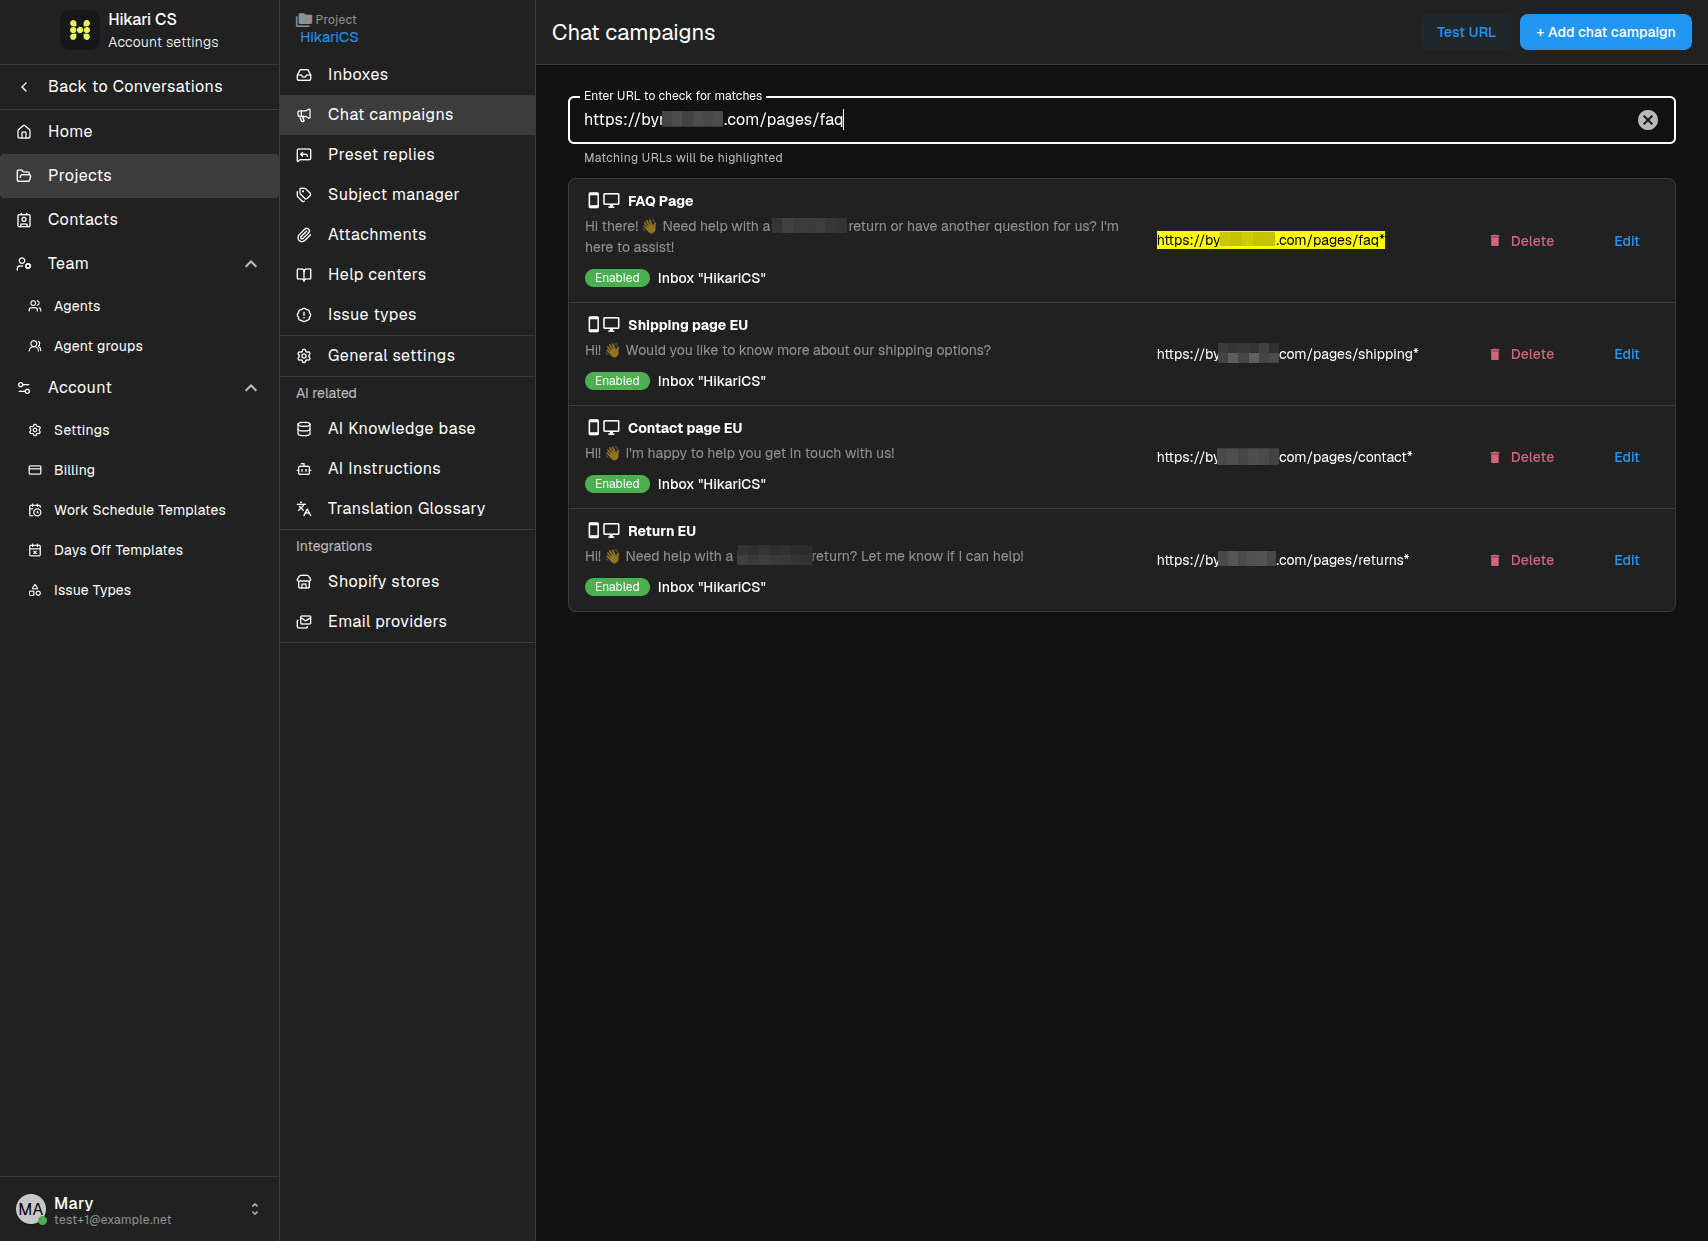
Enter a URL and matching campaign rules will be highlighted. This helps you confirm your wildcards cover the right pages without overlapping unexpectedly.
Summary
- Go to Chat campaigns in your project settings.
- Click + Add chat campaign.
- Enter a title, message, inbox, sender, URLs, and timing.
- Enable the campaign and set device and business-hour limits.
- Use Test URL to verify your URL rules.