Use preset replies
Updated at 2026-07-26
Preset replies are saved message templates for the questions you answer most often. Insert one in a couple of keystrokes instead of typing the same answer again and again.
Insert a preset reply
- Open a conversation and click inside the composer.
- Type
/r— the preset replies menu opens. - Keep typing to filter the list, or scroll through it.
- Click a reply (or highlight it and press Enter) to insert it into the composer.
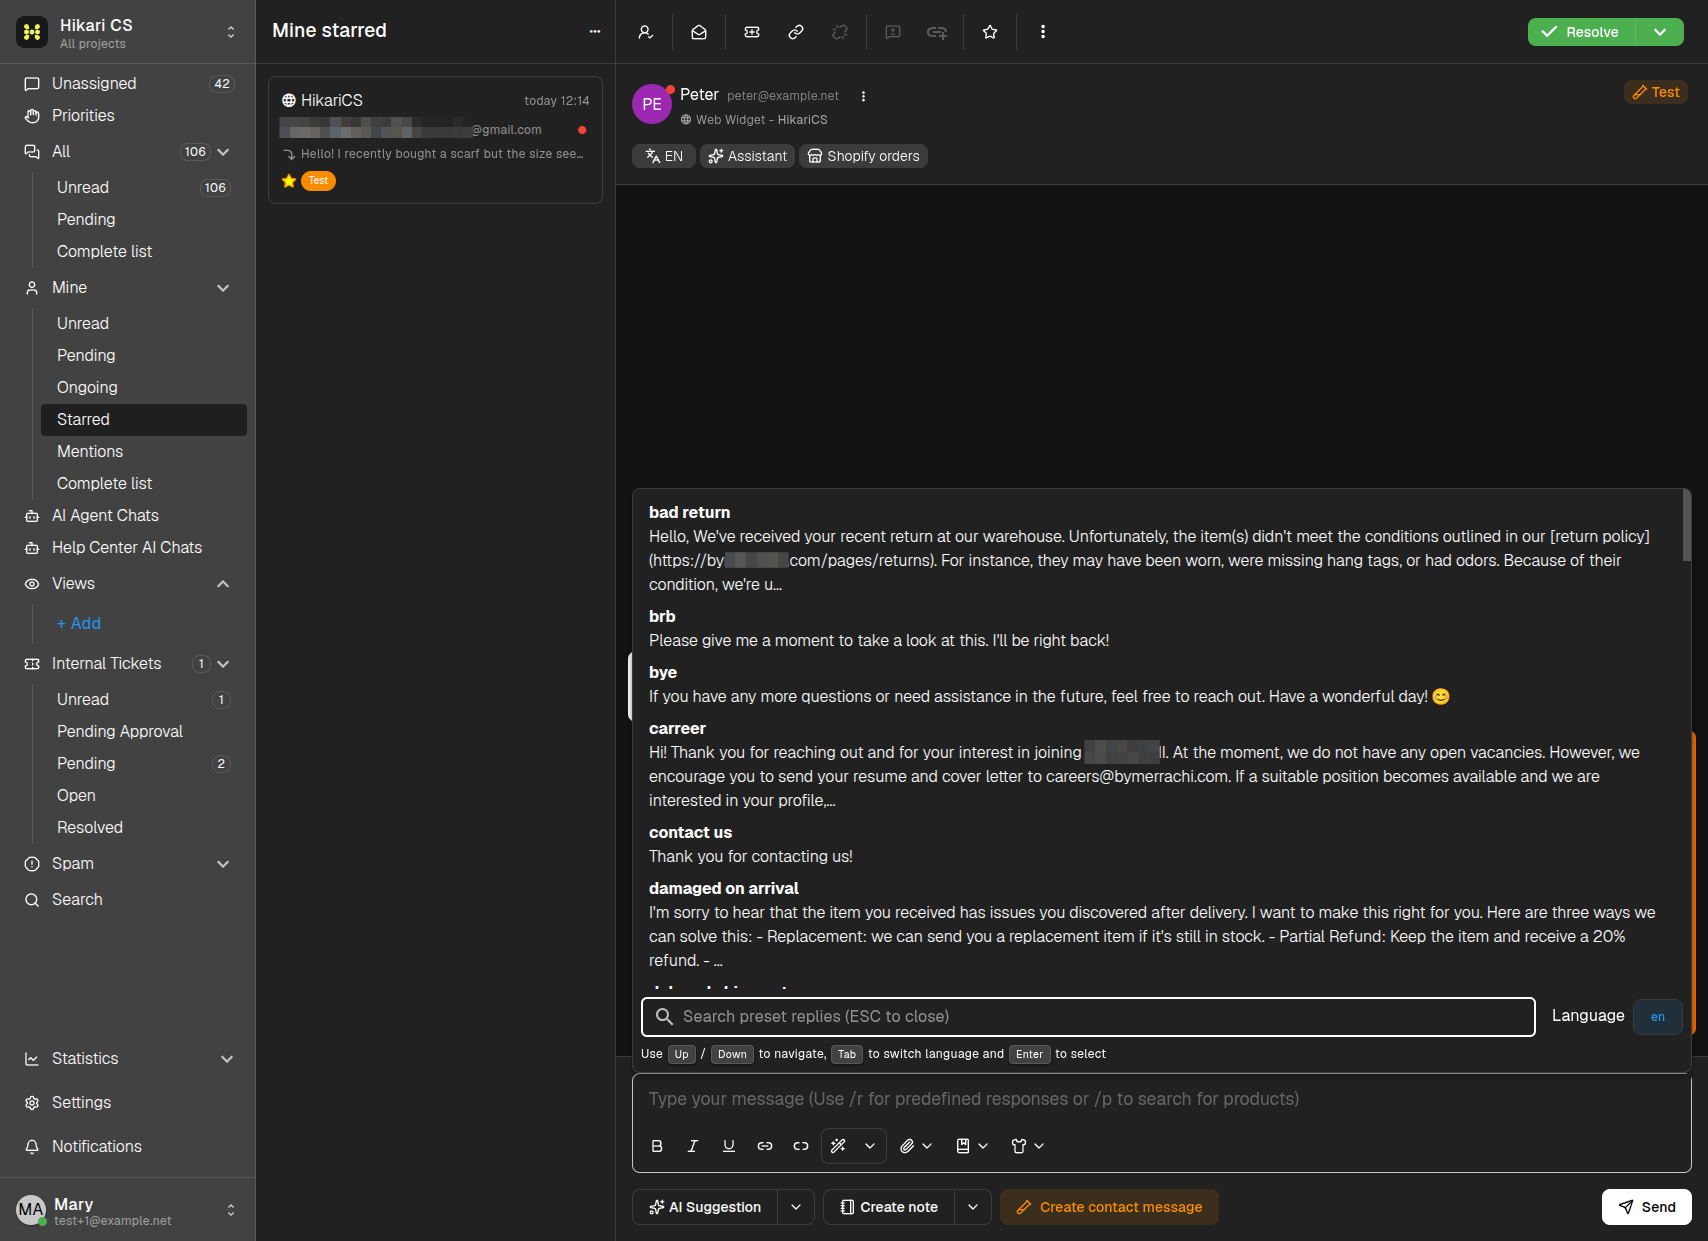
Useful keys while the menu is open:
- Up / Down — Move through the list.
- Tab — Switch the language of the replies.
- Enter — Insert the selected reply.
- Esc — Close the menu.
The reply is inserted as normal text, so you can edit it before sending or send it as-is.
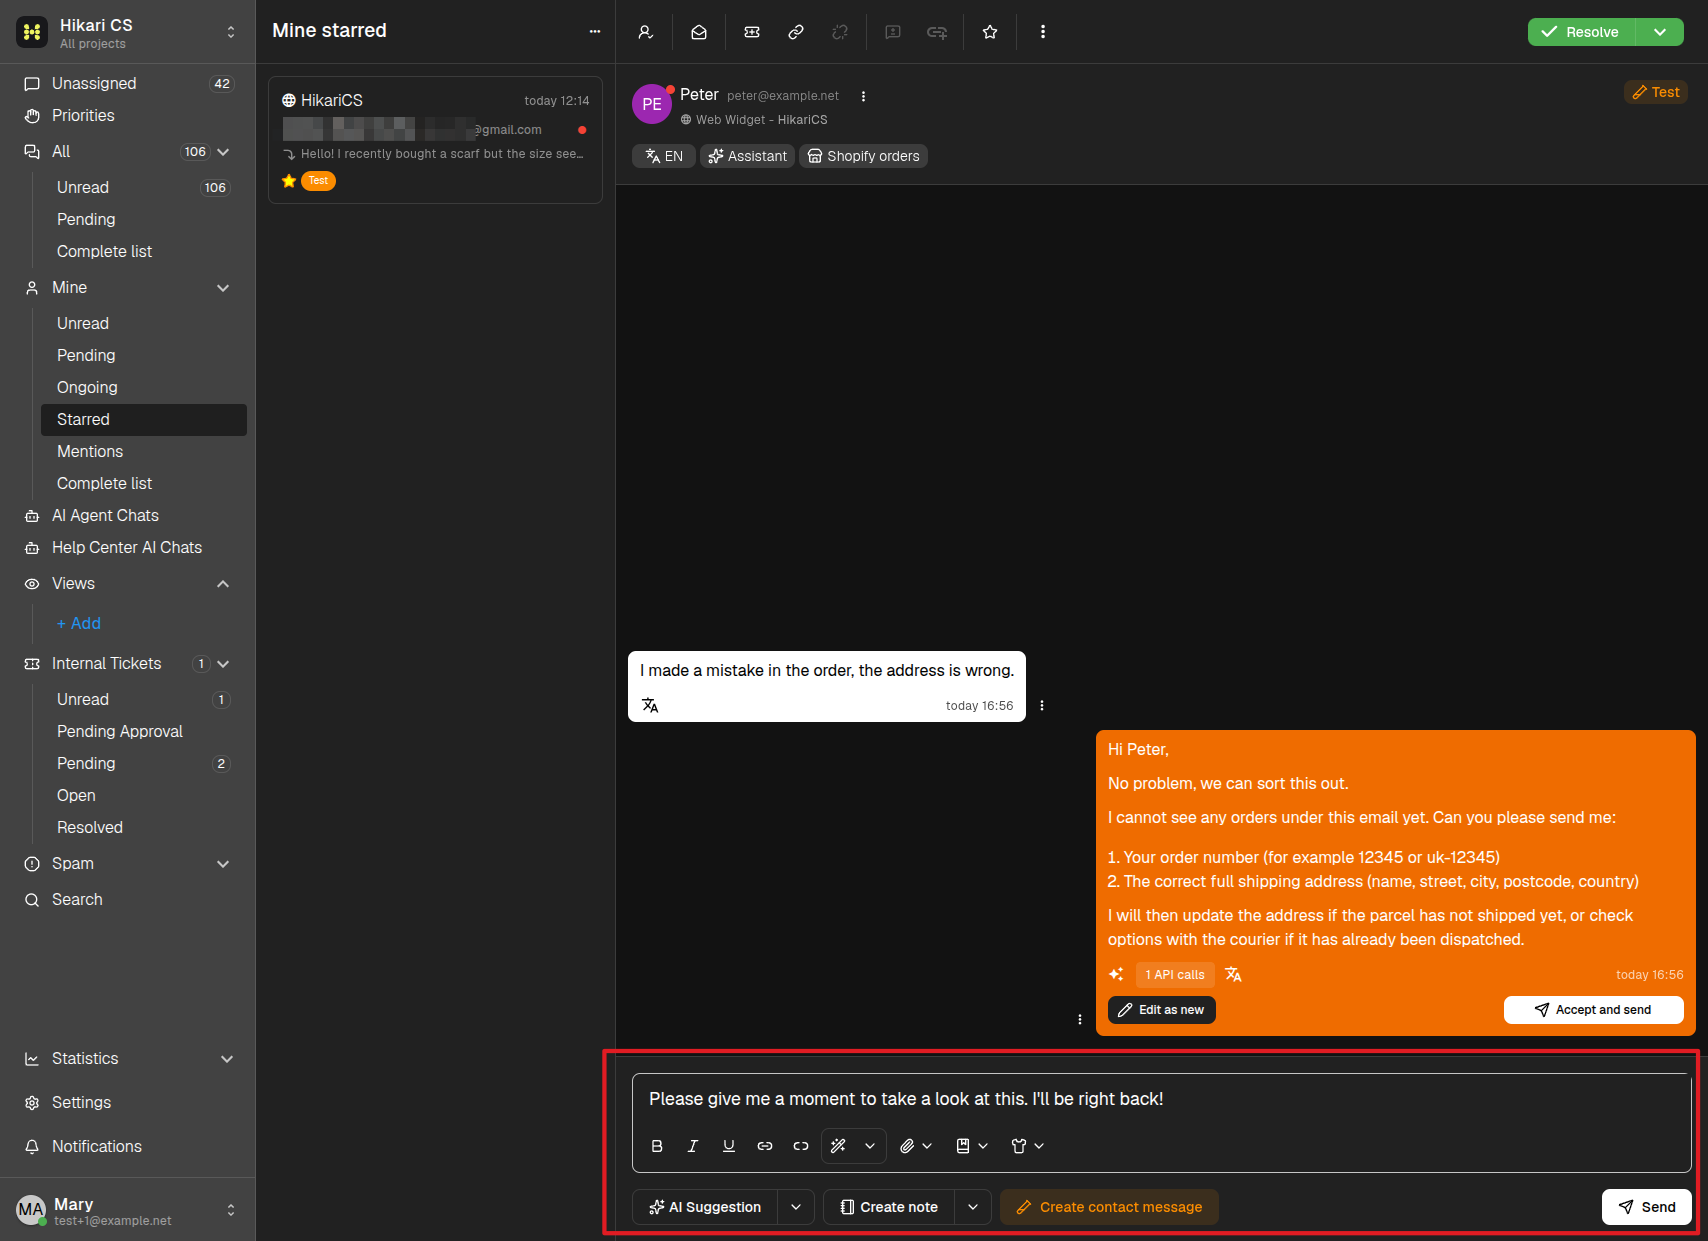
You can also open the same menu with the bookmark icon in the composer toolbar.
Manage preset replies
Preset replies are configured in the project settings:
- Go to Settings and select your project.
- Click Preset replies in the project menu.
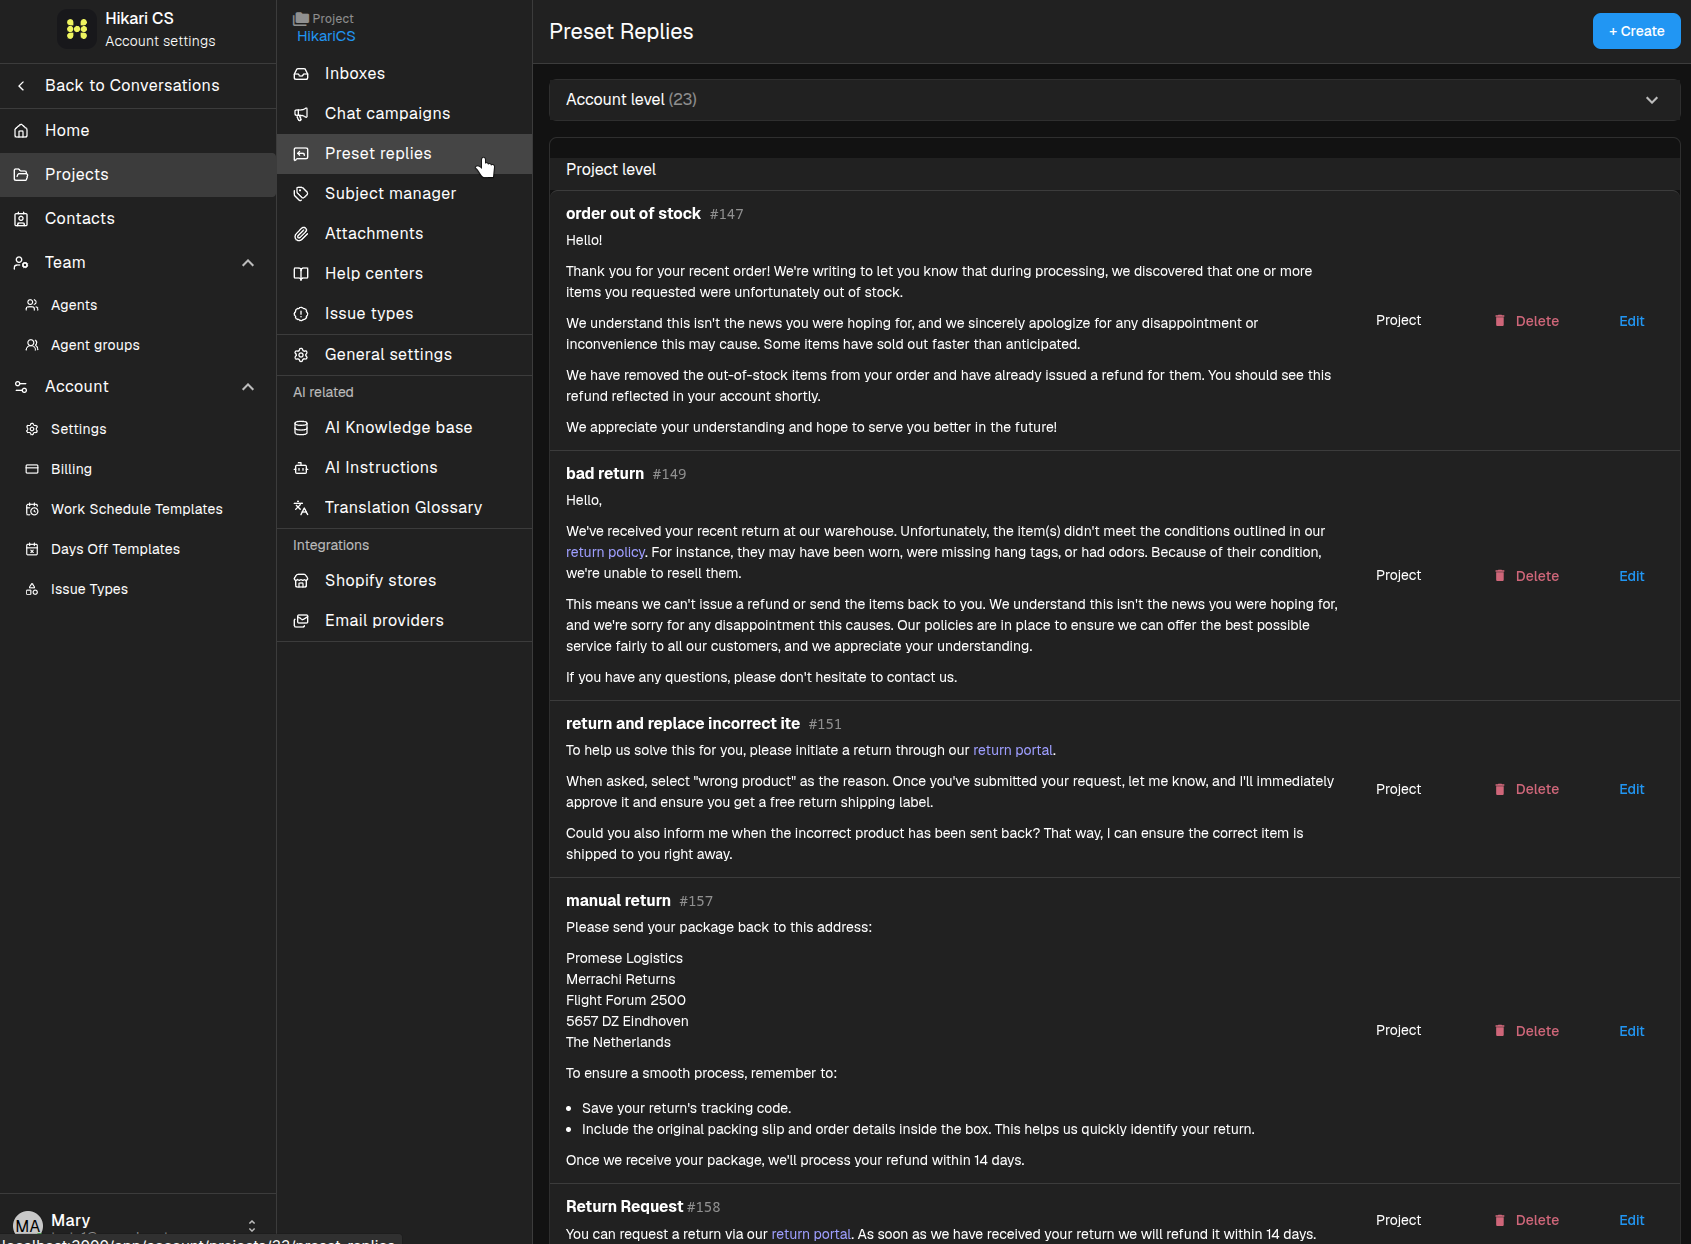
There are two levels of preset replies:
- Account level — Shared across all projects in your account.
- Project level — Available only in the project where they were created. These show a Project badge in the list.
From this page you can:
- Click + Create to add a new preset reply.
- Click Edit next to a reply to change its name or text.
- Click Delete to remove a reply you no longer need.