How to setup internal ticket inbox
Updated at 2026-07-26
The internal ticket inbox lets your team handle internal support requests by email. It works like a regular email inbox but is dedicated to tickets raised within your organization.
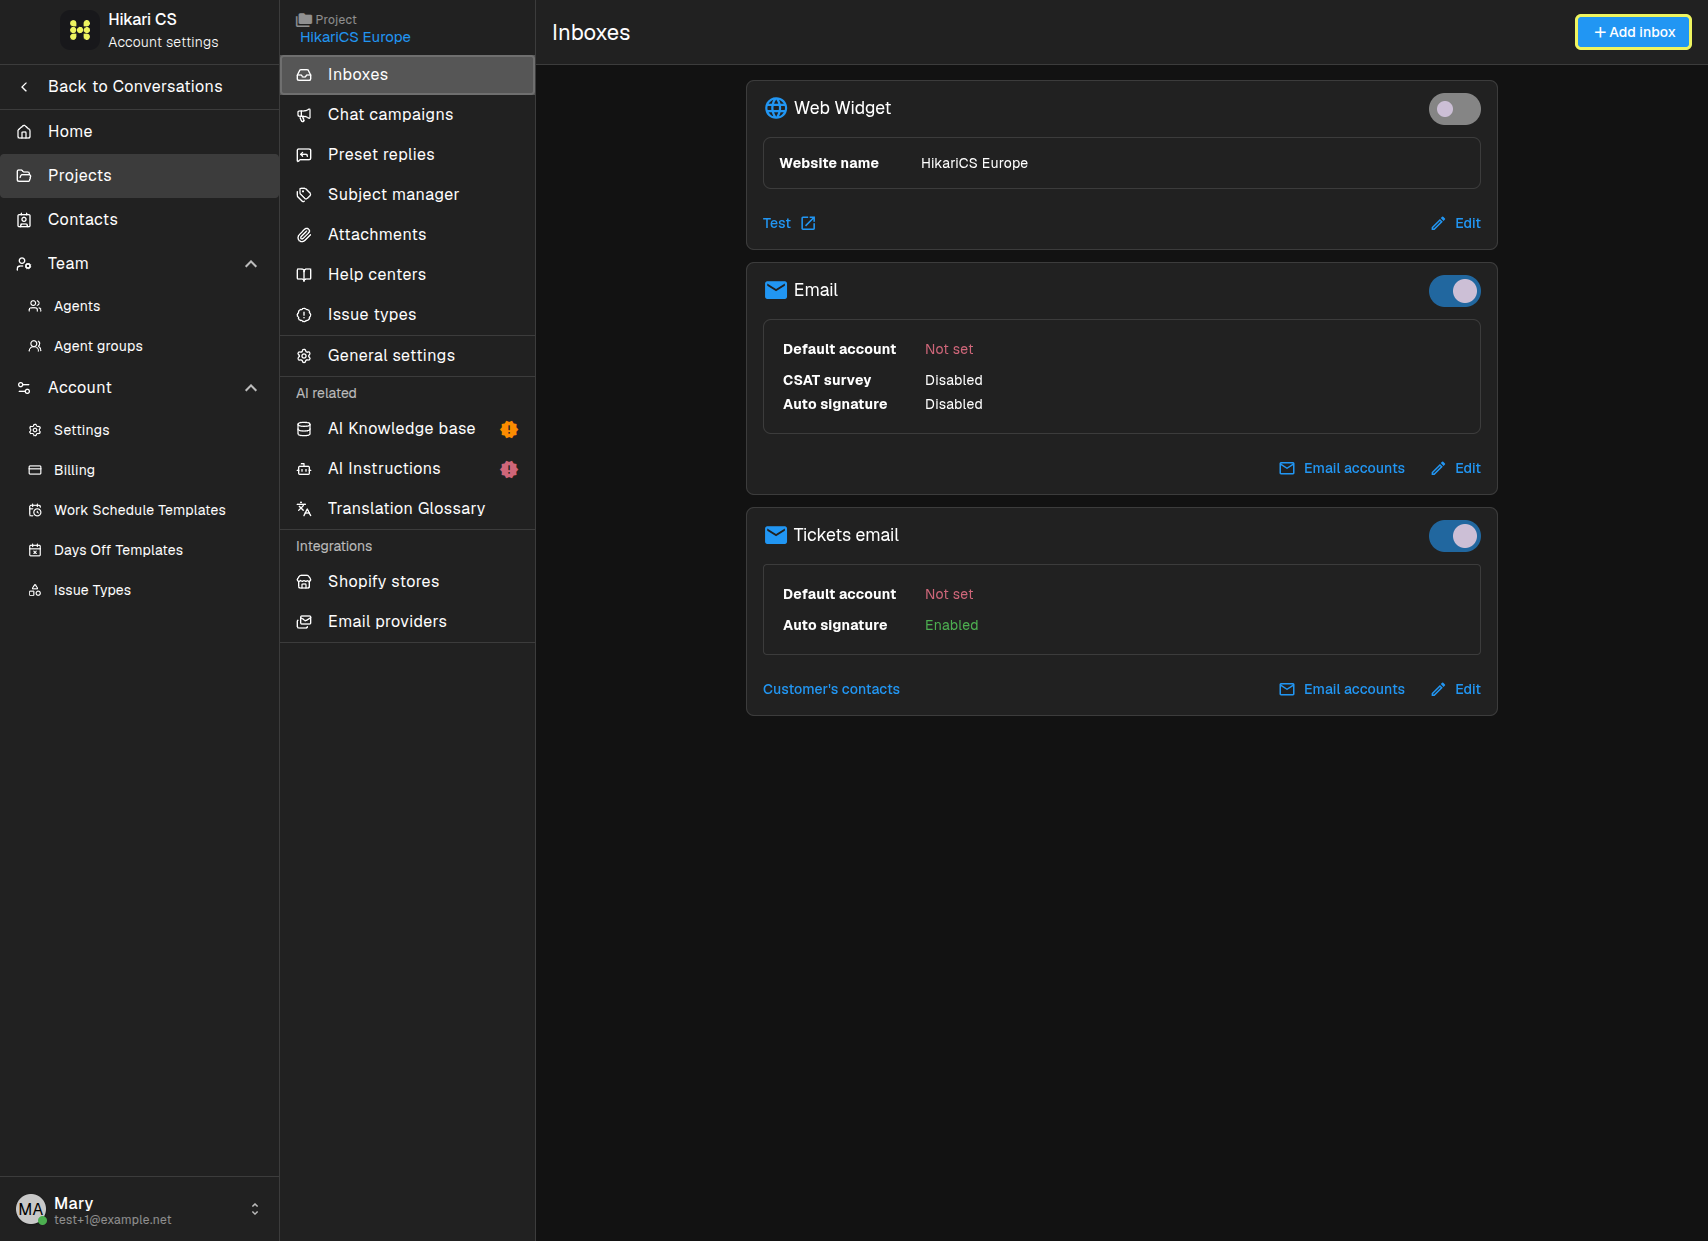
Open the Inboxes page
Go to your project settings and open the Inboxes page.
Add a ticket inbox
Click Add inbox and select Tickets email. Choose how you want to connect the ticket inbox to send and receive emails.
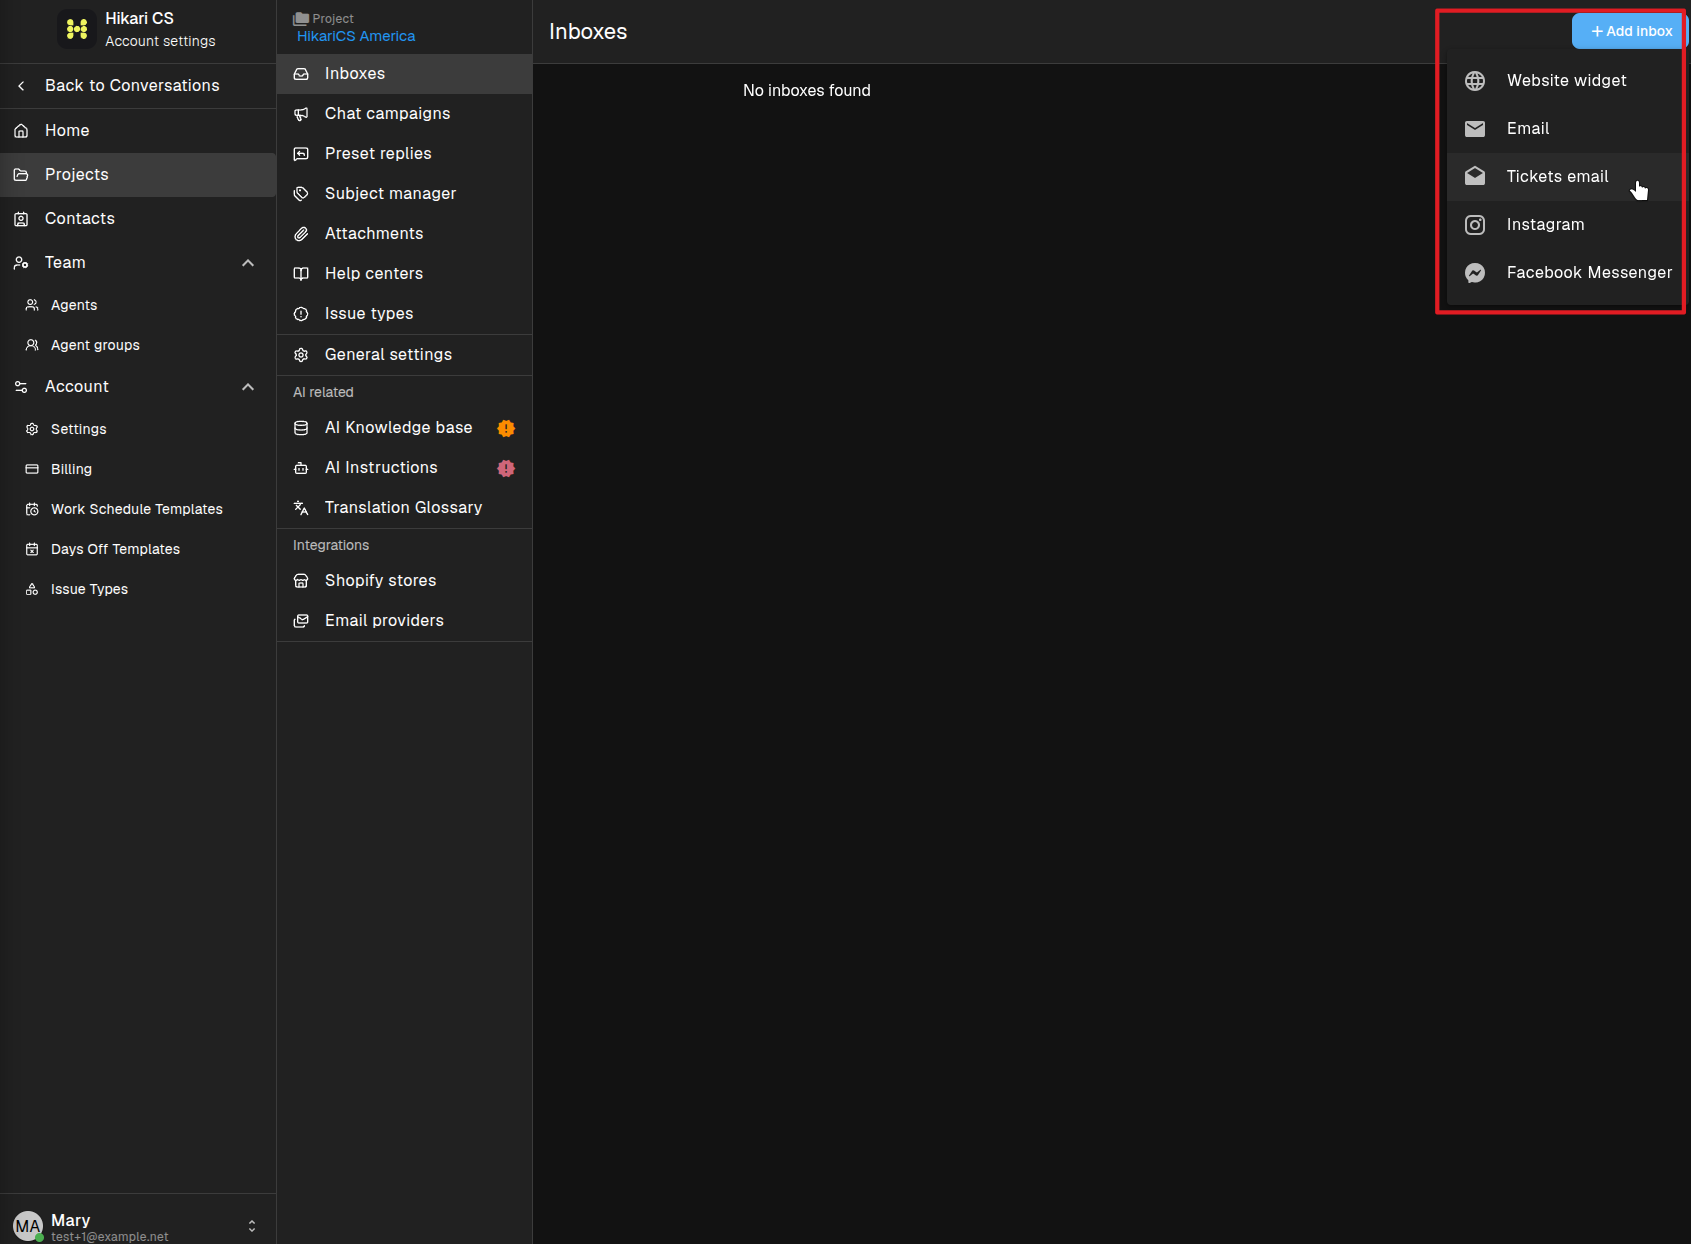
- Microsoft 365 account — for Outlook and Microsoft-hosted email.
- Gmail (via IMAP/SMTP) — for Google Workspace or Gmail addresses.
- Other (via IMAP/SMTP) — for any other email provider.
- Advanced settings — create the inbox and configure accounts separately.
Manage ticket email accounts
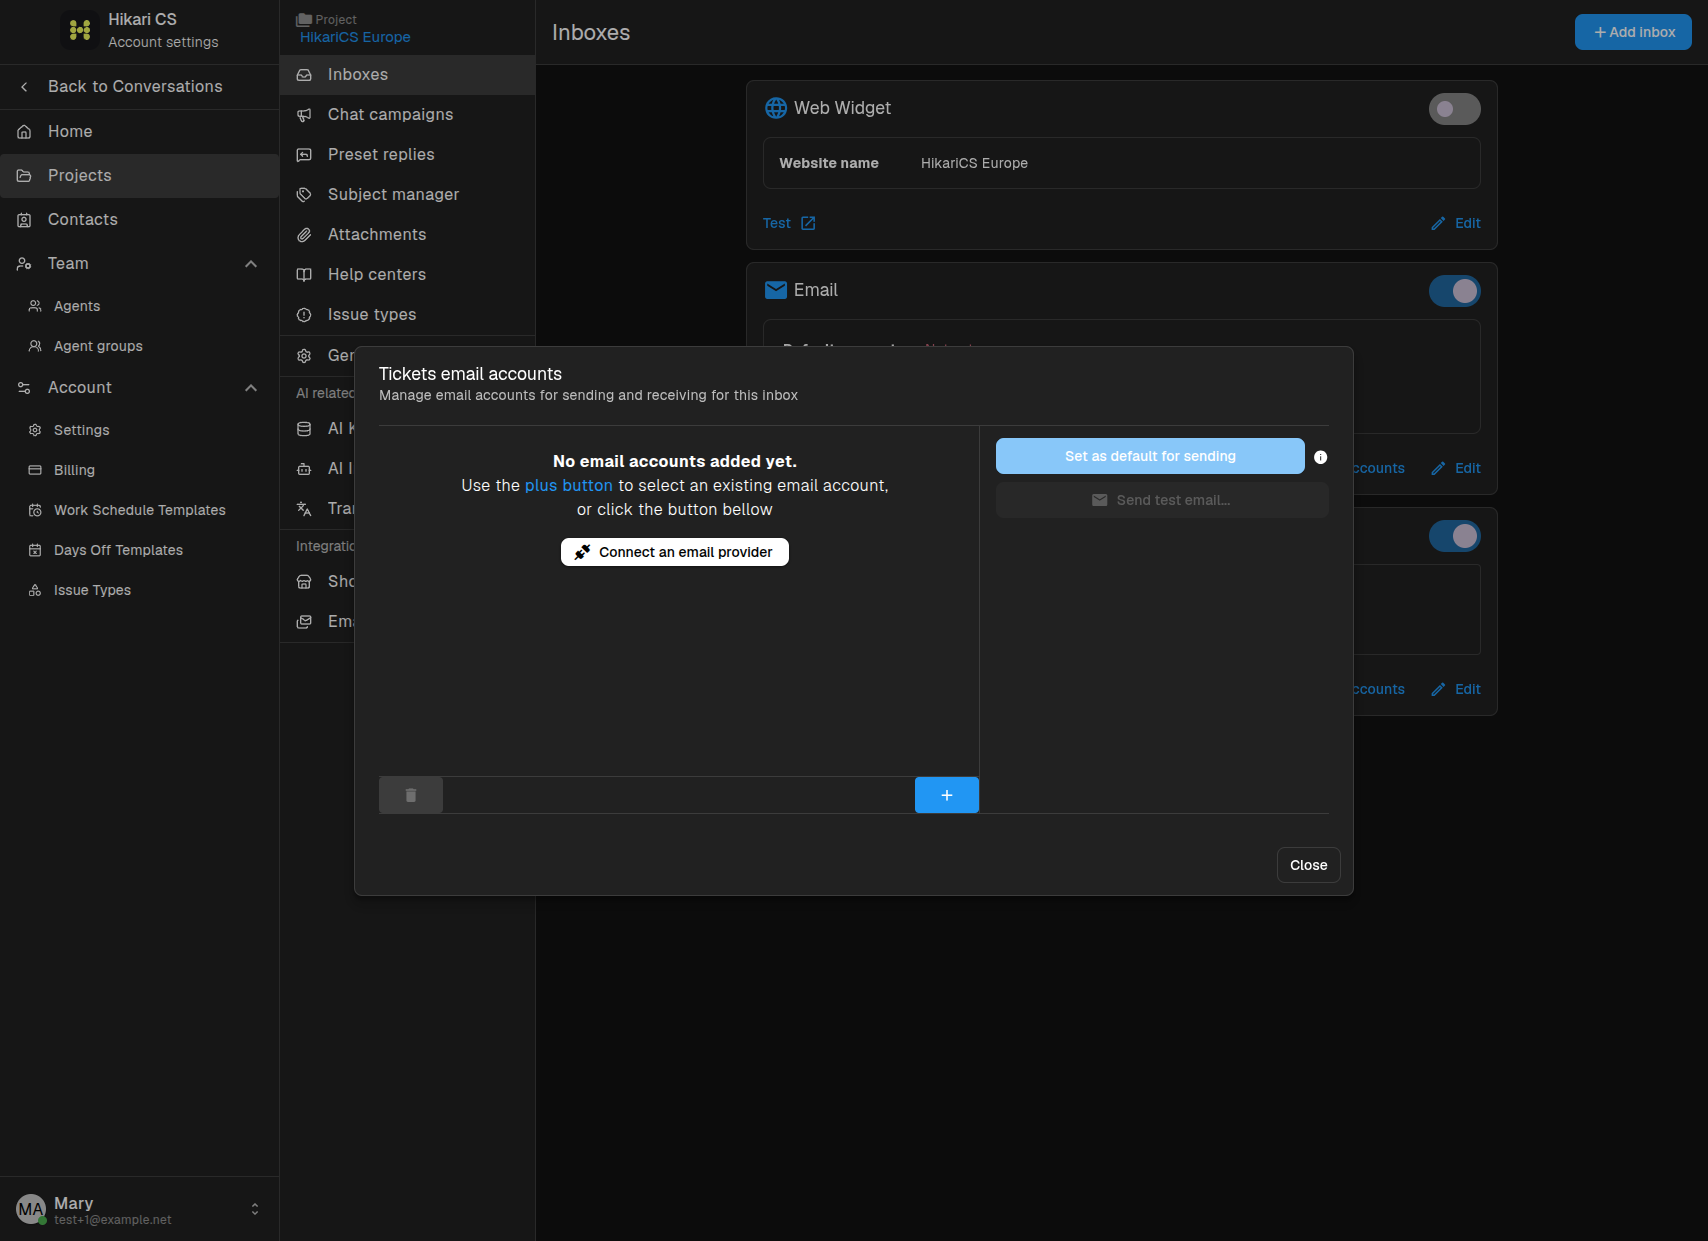
After the inbox is created, click Email accounts to connect an email provider or select an existing account.
Configure ticket channel settings
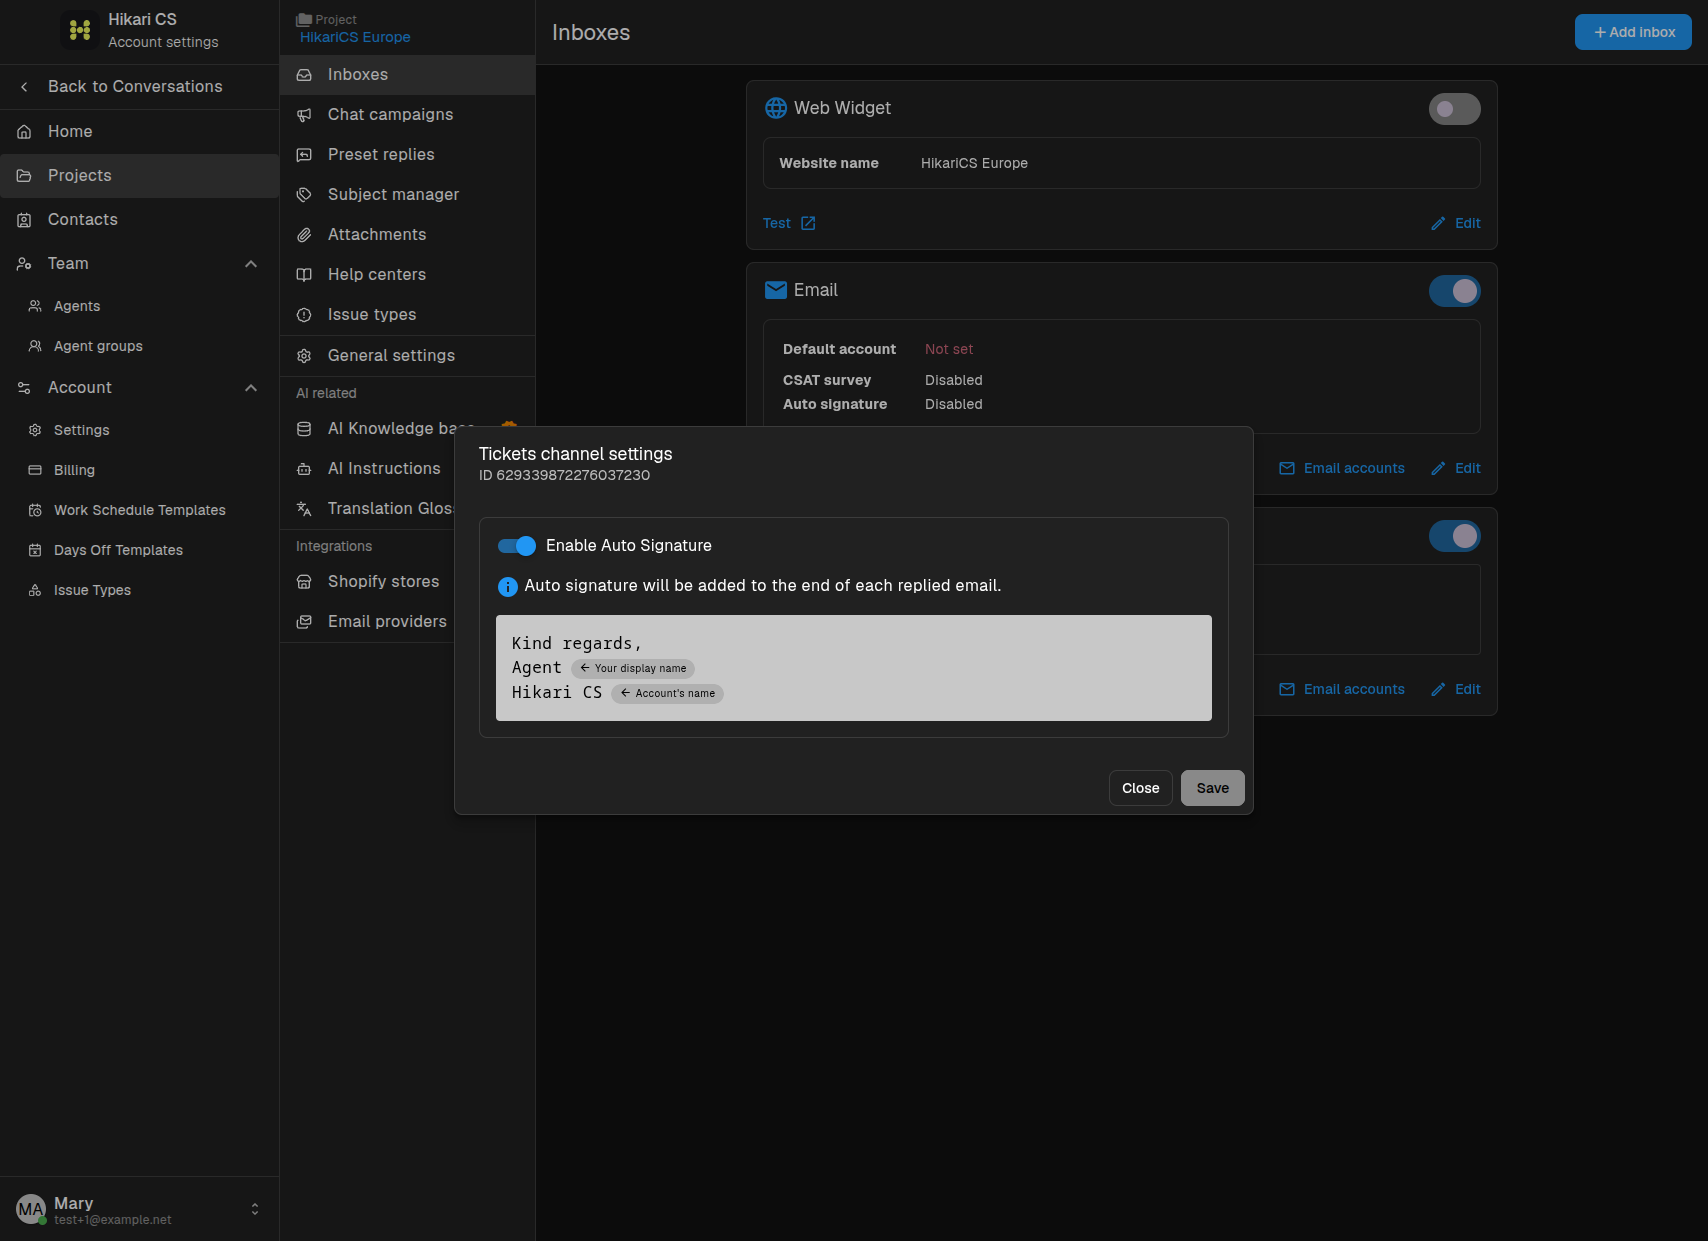
Click Edit on the Tickets email inbox to open the channel settings. Here you can enable or disable the automatic signature and set the display name and account name used in replies.
Auto signature
When enabled, the configured signature is added to the end of every reply sent from this inbox.
Display name and account name
Set the Your display name and Account's name that recipients see when they receive a ticket reply.
Summary
- Open Inboxes in your project settings.
- Click Add inbox > Tickets email.
- Choose a connection method or use Advanced settings.
- Connect an email account and configure the channel settings.
- Set the auto signature and display name for ticket replies.