Configuring the DNS for authenticated emails
Updated at 2025-03-19
As of April 2024, major email providers are requiring more strict rules to send and receive emails. As Hikari CS will also be sending email on behalf of your business, we need to make sure this email doesn't end up in the spam folder of your customer's inbox.
But Hikari CS is not managing my email support inbox?
Even if we don't manage your email support inbox we'll still send emails on behalf of your domain. People who go offline in the chat will receive an email with our replies and those emails will be sent on behalf of your domain.
In this guide we'll walk you through 3 simple steps to set up email authentication correctly through the DNS settings of your domain.
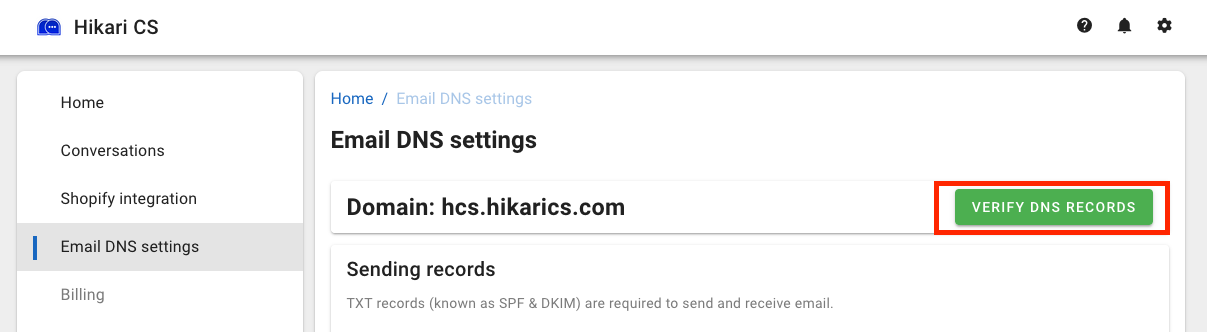
Step 1: Log in to your Hikari CS customer portal
Login to your customer portal and go to "Email DNS settings". Here you'll find 3 sections:
- SPF record (1 record)
- DKIM record (1 record)
- MX records (2 records)
For each record you'll find the settings you need to add to your domain's DNS settings. Keep this browser tab open, now open a new tab and go to your domain provider's customer portal.
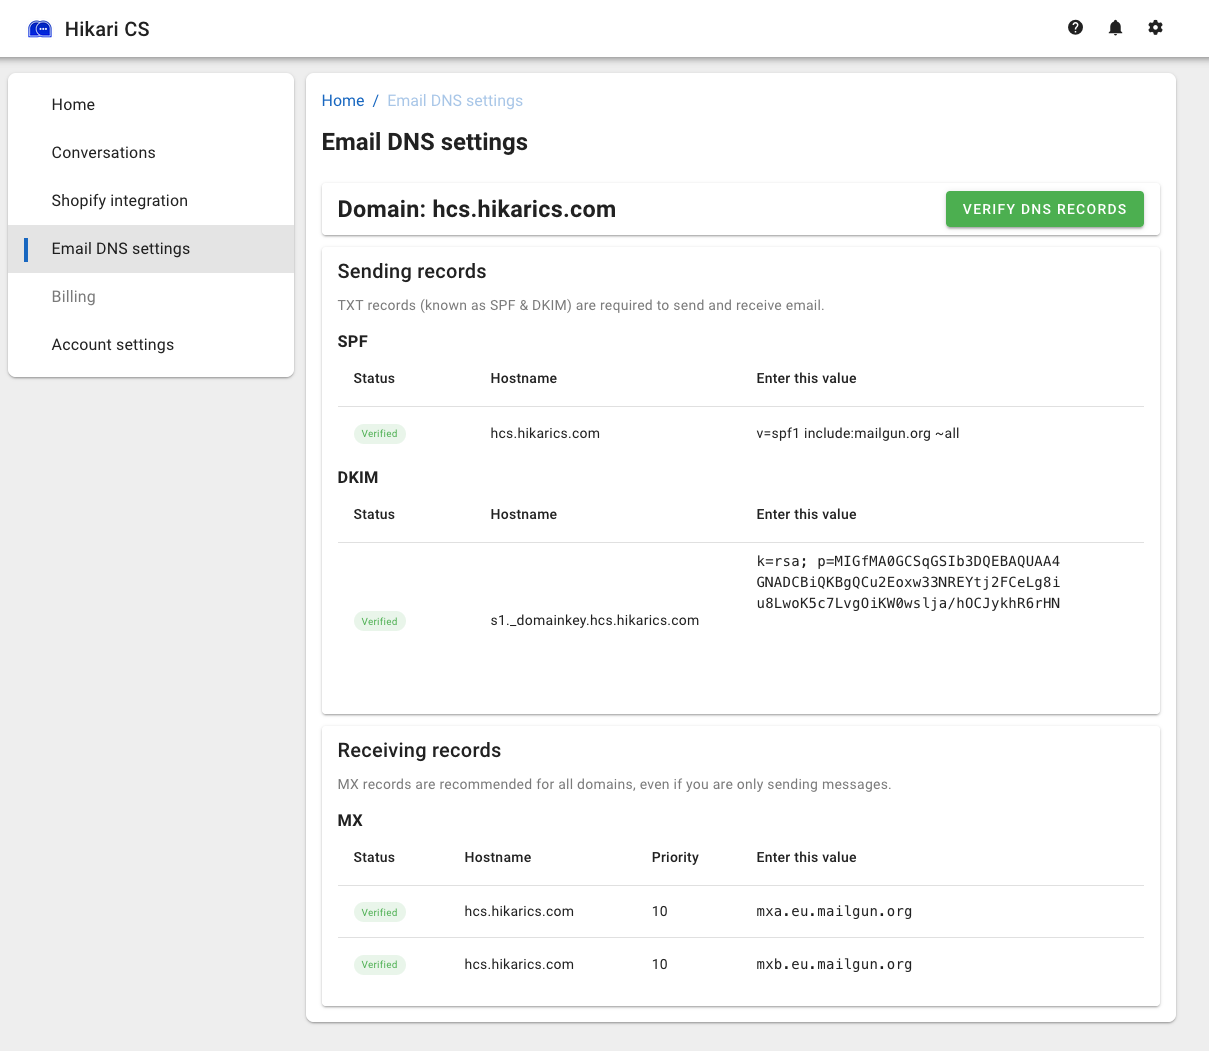
Please note that above screenshot is just an example.
Step 2: Edit your DNS settings
In the portal of your hosting provider, you should be able to find a section called "DNS Settings". How this looks like varies per provider, but generally speaking this should be a table like view with multiple rows and the ability to add new rows. Each row has multiple columns usually consisting out of:
- Recordname, name or hostname
- Type
- Value
- TTL
Please see an example below:

There should also be a button to "Add a Record" or something similar. This allows you to add new rows.
In this case you need to add 4 new rows:
- Add a row for the SPF record. The type is TXT. Copy the values from the Hikari CS customer portal to the corresponding fields.
- Add a row for the DKIM record. The type is TXT. Copy the values from the Hikari CS customer portal to the corresponding fields.
- Add a row for the 1st MX record. The type is MX. Copy the values from the Hikari CS customer portal to the corresponding fields. If there is no separate field for the priority, add the priority in front of the value as in above example.
- Add a row for the 2nd MX record. The type is MX. Copy the values from the Hikari CS customer portal to the corresponding fields. If there is no separate field for the priority, add the priority in front of the value as in above example.
Then finally click save.
If you need help setting up your DNS, feel free to reach out to us!